

Integración de SecureAI con Elastic SIEM
Esta guía proporciona instrucciones paso a paso sobre cómo integrar SecureAI con su instancia de Elastic SIEM. Esta integración le permite reenviar registros de eventos desde SecureAI a Elasticsearch para monitoreo, análisis y alertas.Paso 1: Obtenga su endpoint de Elastic Cloud
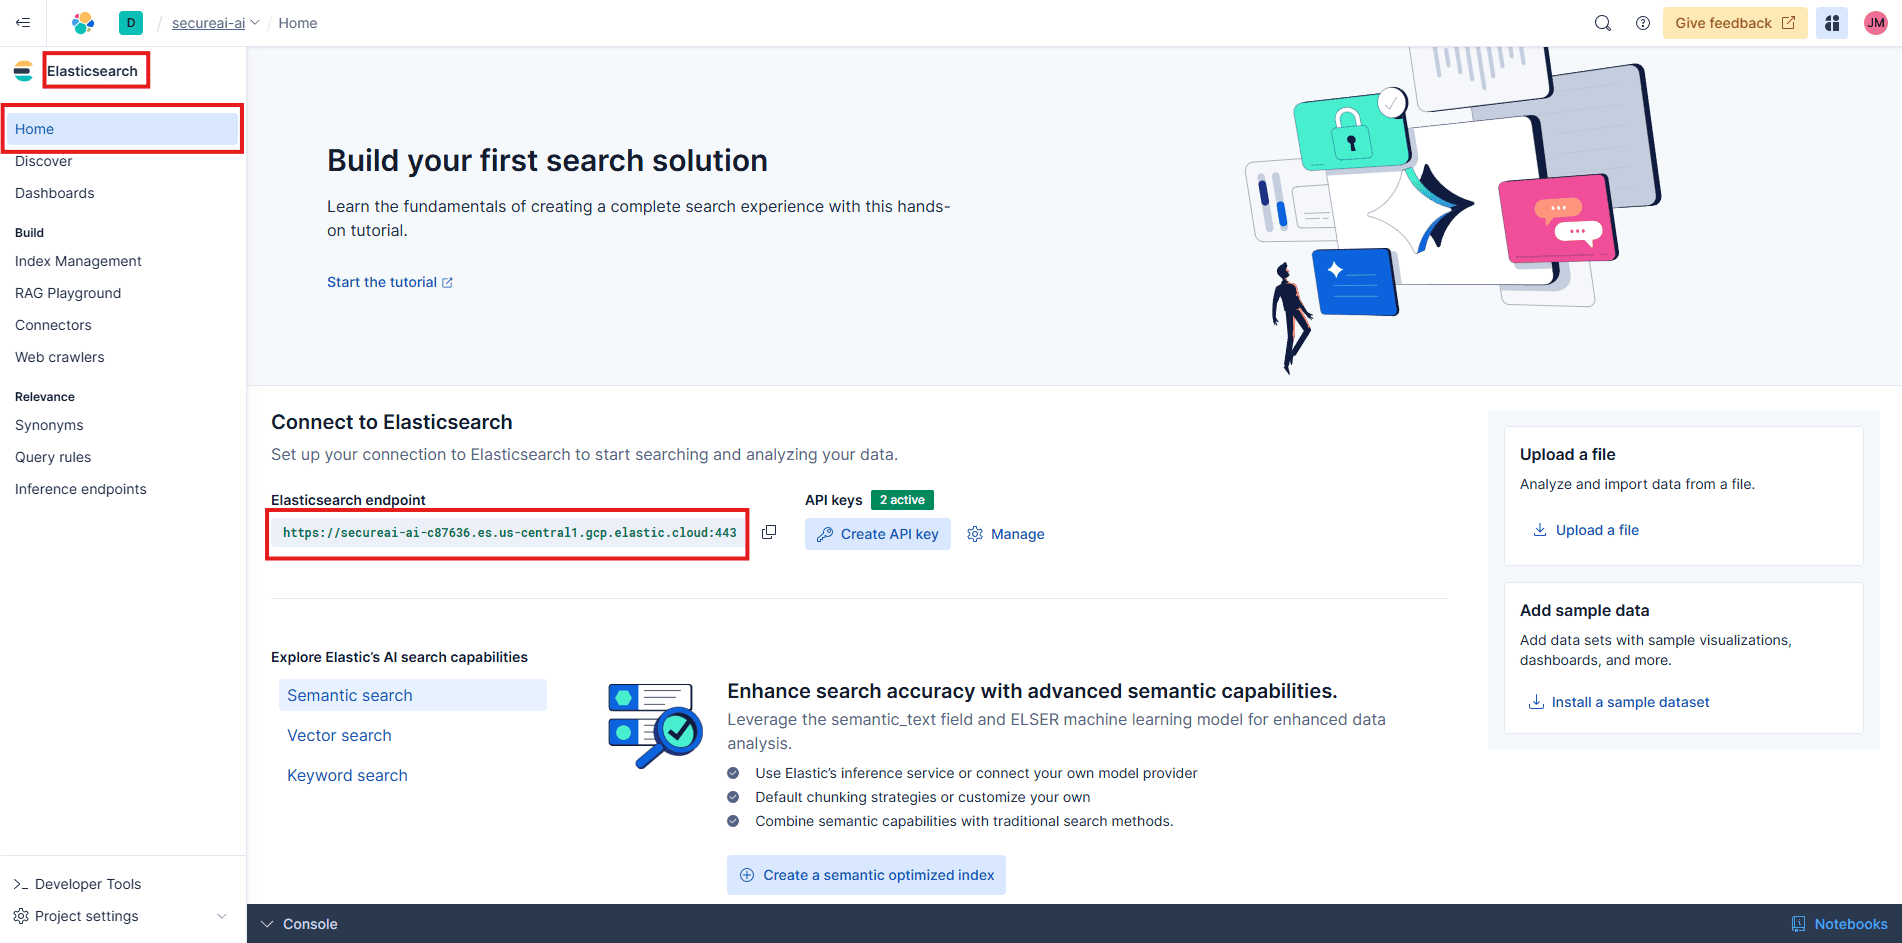
Primero, debe obtener la URL del endpoint de su implementación de Elastic Cloud.- Inicie sesión en su cuenta de Elastic Cloud.
- Desde la página de inicio, localice la implementación que desee.
- Busque la URL del endpoint de Elasticsearch y cópiela. Lo necesitará para la configuración de SecureAI más adelante.
Paso 2: crear una clave API en Elasticsearch
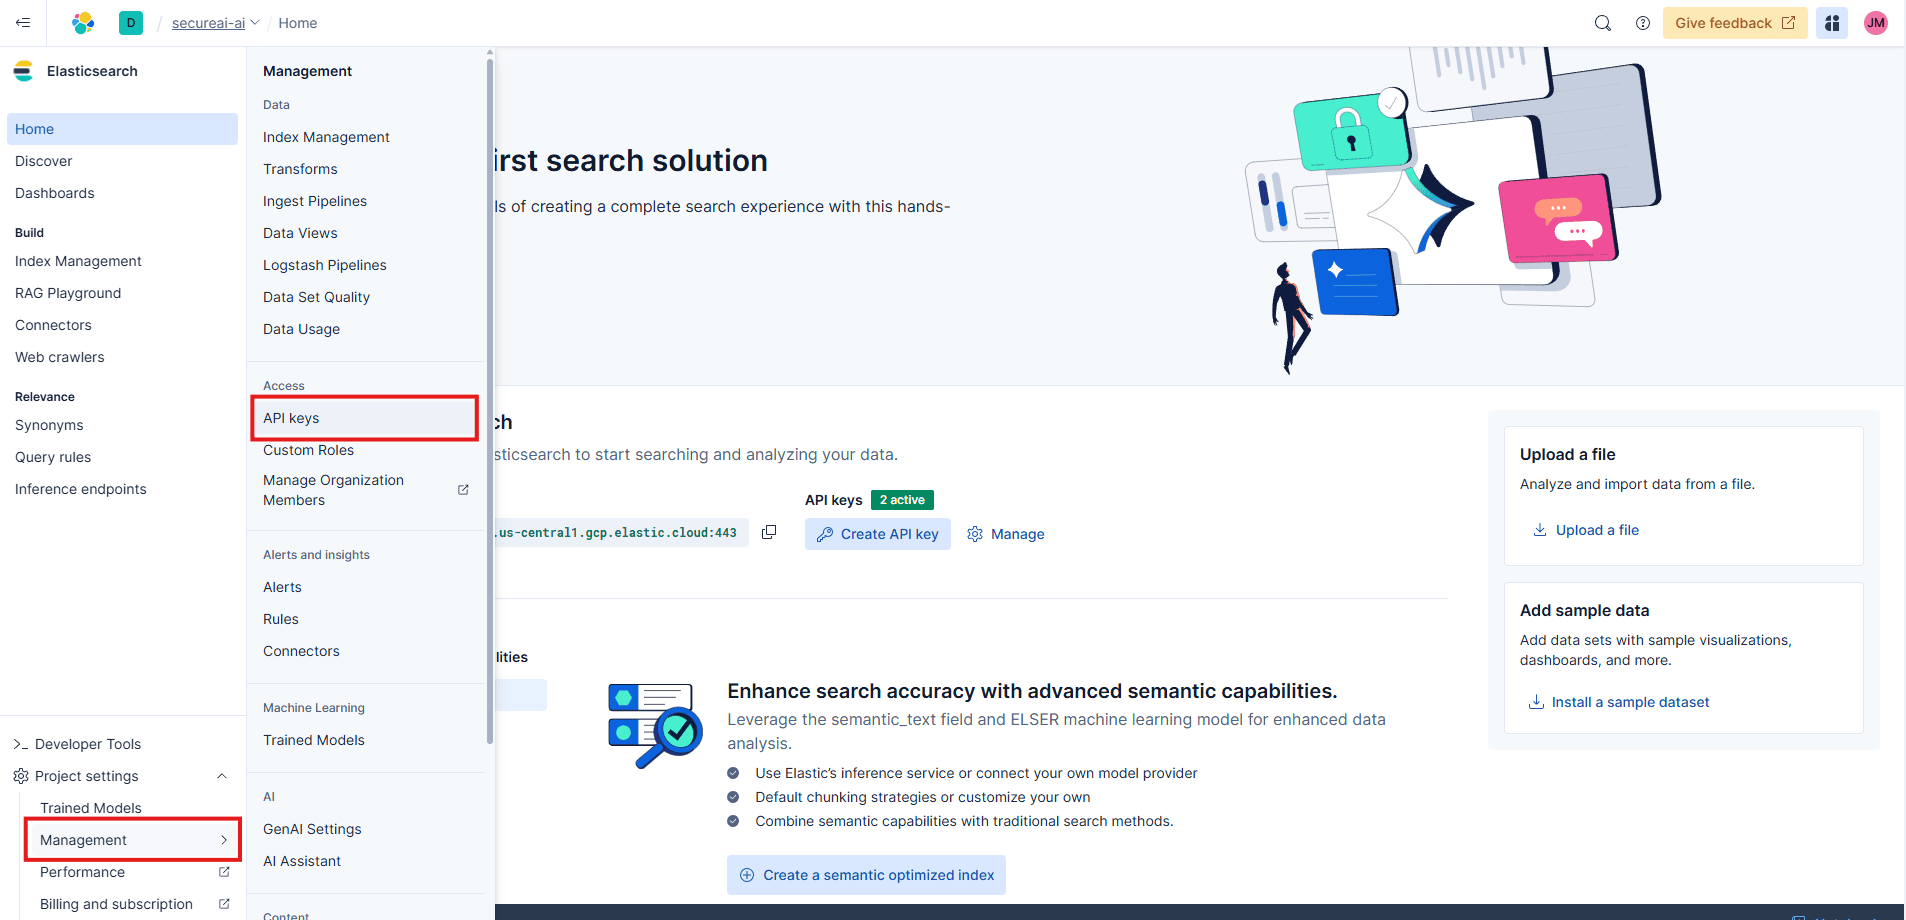
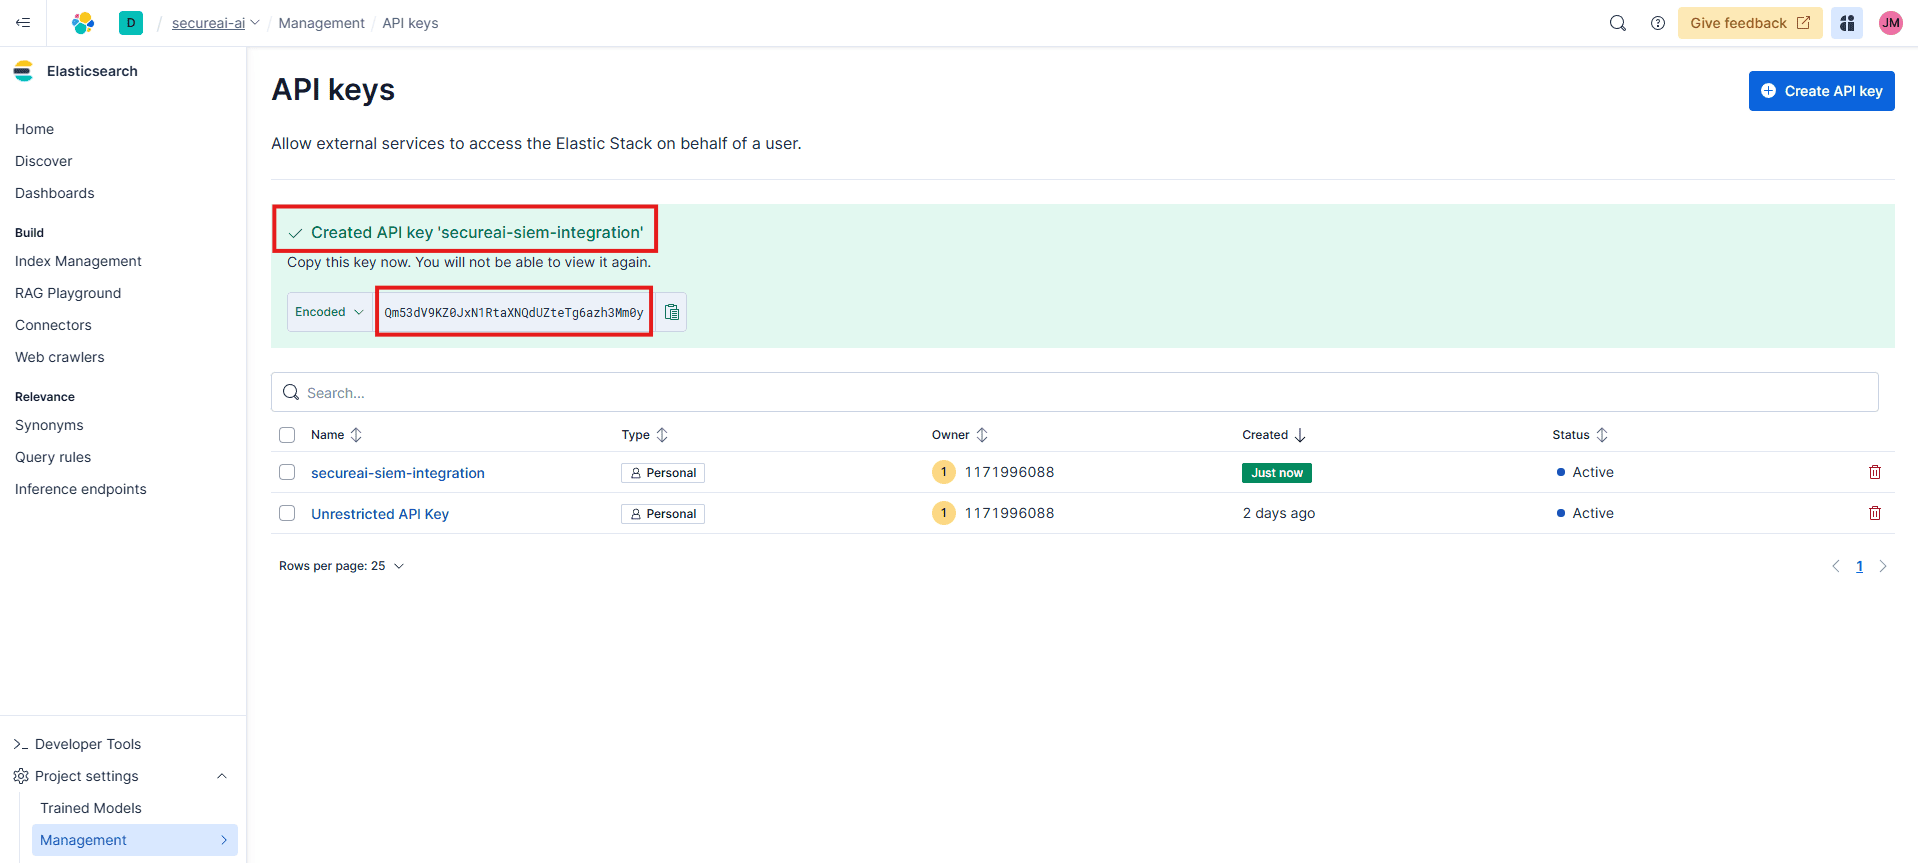
Se requiere una clave API para que SecureAI envíe datos de forma segura a su clúster de Elasticsearch.- En su panel de Kibana, navegue hasta Administración > Claves API.
- Haga clic en el botón Crear clave API.
- Configure la clave API con los siguientes detalles:
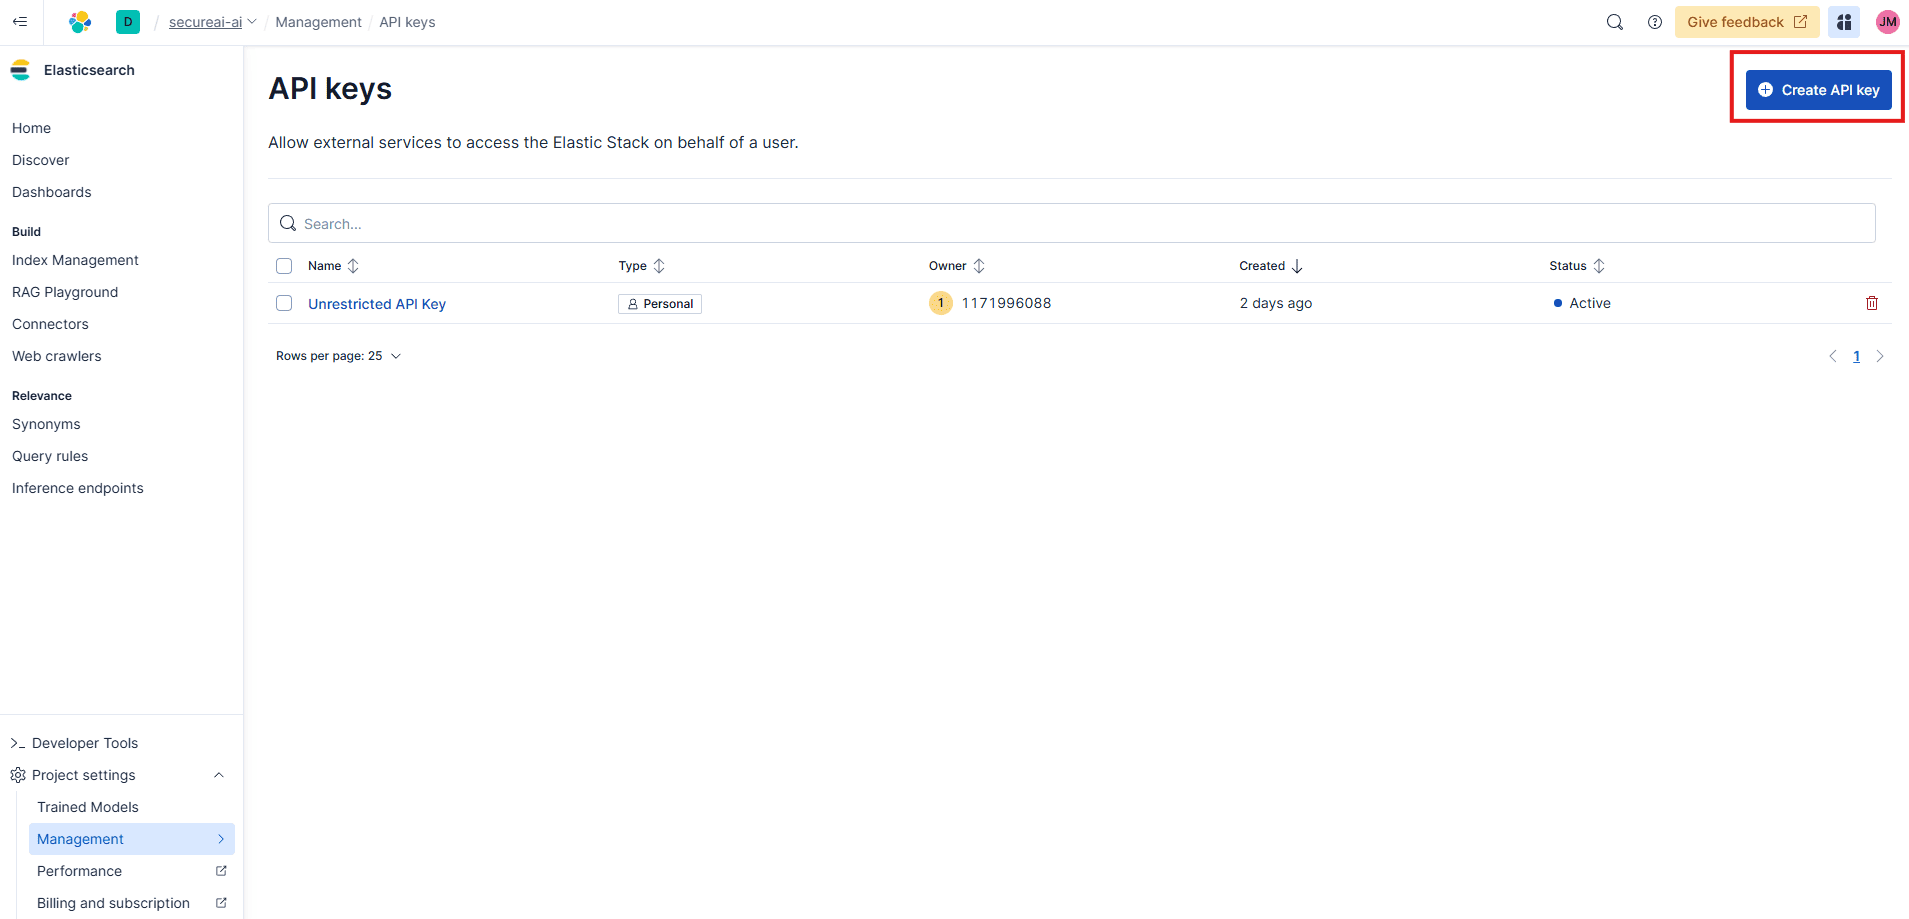
- Nombre:
secureai-siem-integration(u otro nombre descriptivo). - Rol: Asigne un rol que tenga los privilegios necesarios para escribir en índices. Para simplificar esta guía, no establecemos una fecha de vencimiento ni restricciones de funciones específicas.
- Haga clic en Crear clave API.
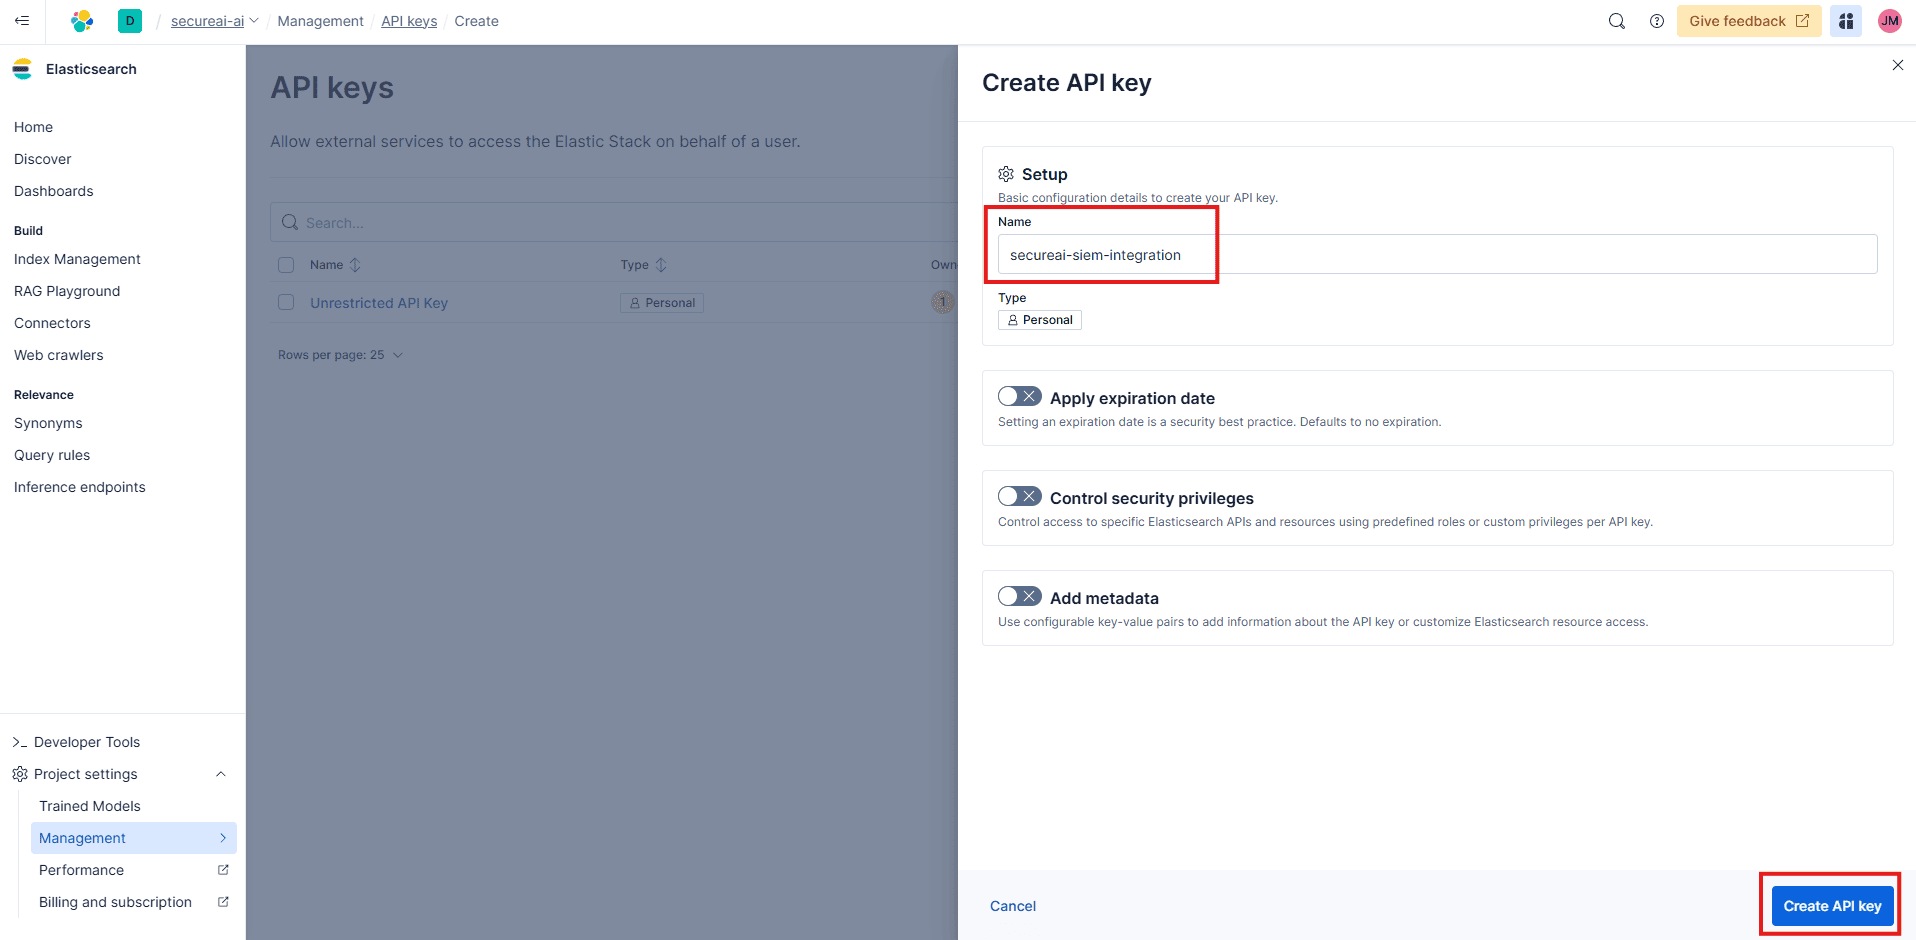
- Su clave será generada y mostrada. Copie la clave API codificada en Base64 y guárdela en una ubicación segura. No podrá volver a verlo después de salir de esta pantalla.
Paso 3: Crear el índice objetivo en Elasticsearch
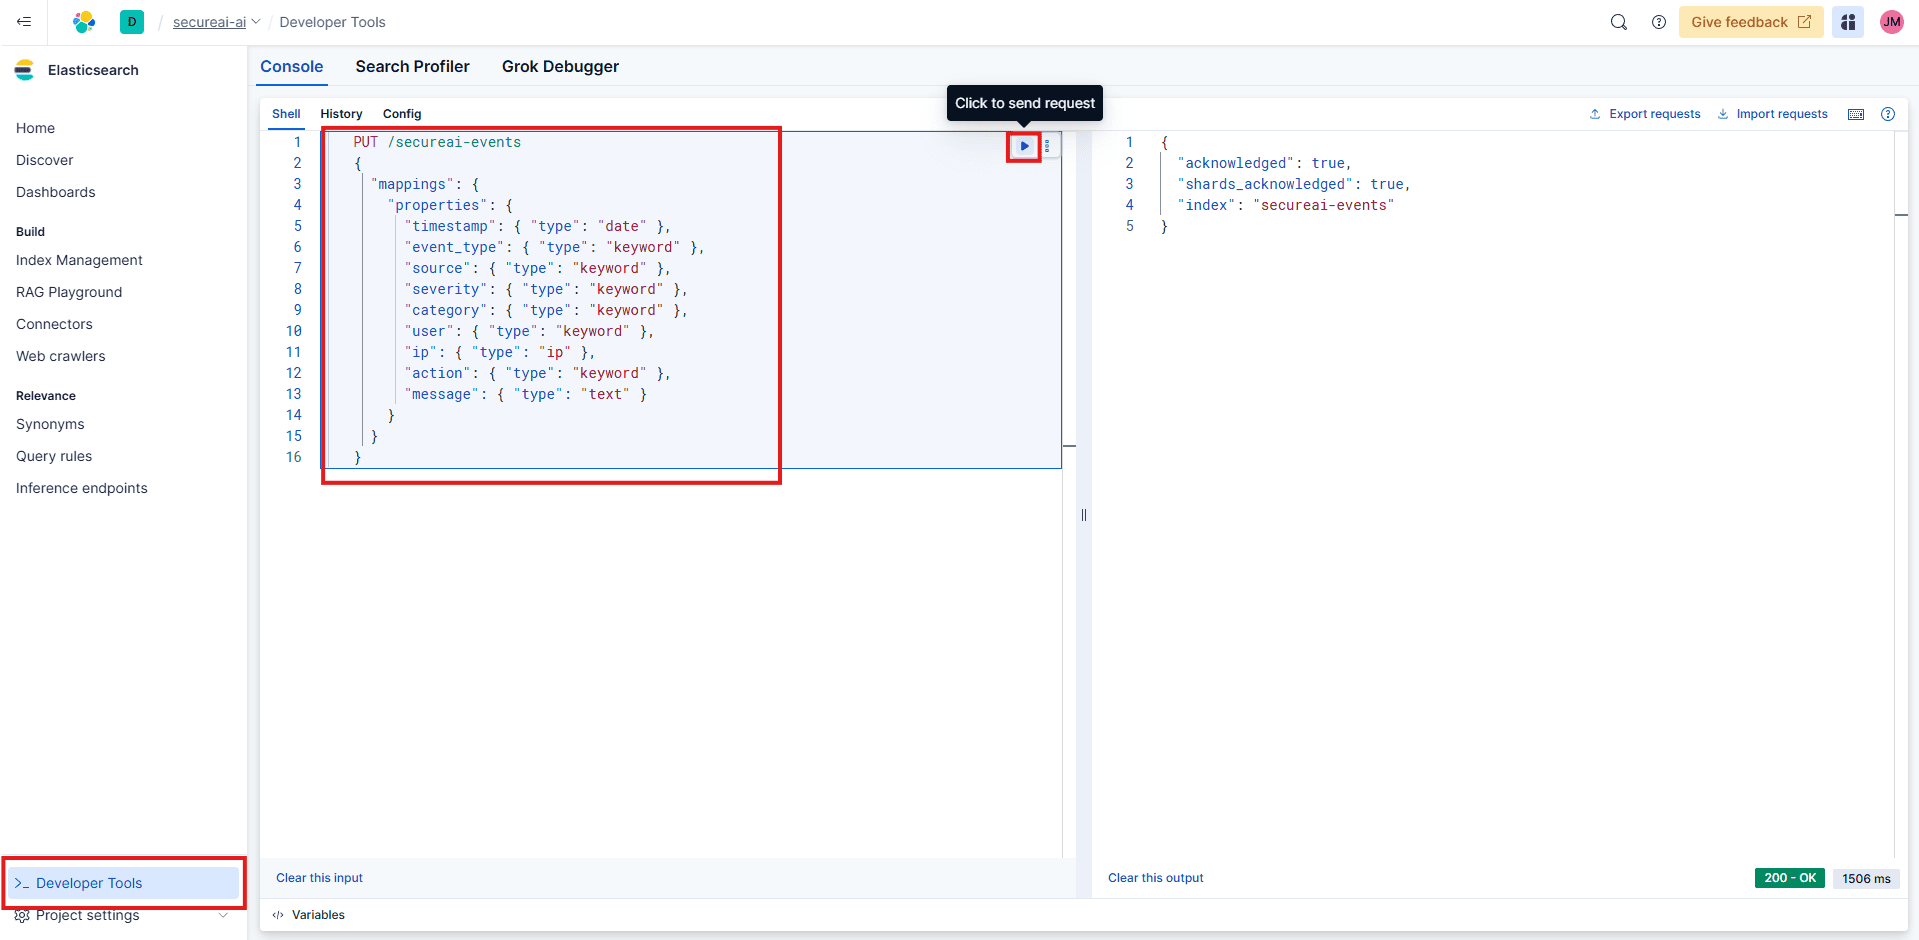
Debe crear y asignar un índice en Elasticsearch donde se almacenarán los eventos de SecureAI.- En Kibana, navegue hasta Herramientas de desarrollador.
- En la consola, ejecute el siguiente comando para crear el índice
secureai-eventscon las asignaciones de campos apropiadas:
Paso 4: Configurar la integración Elastic SIEM en SecureAI
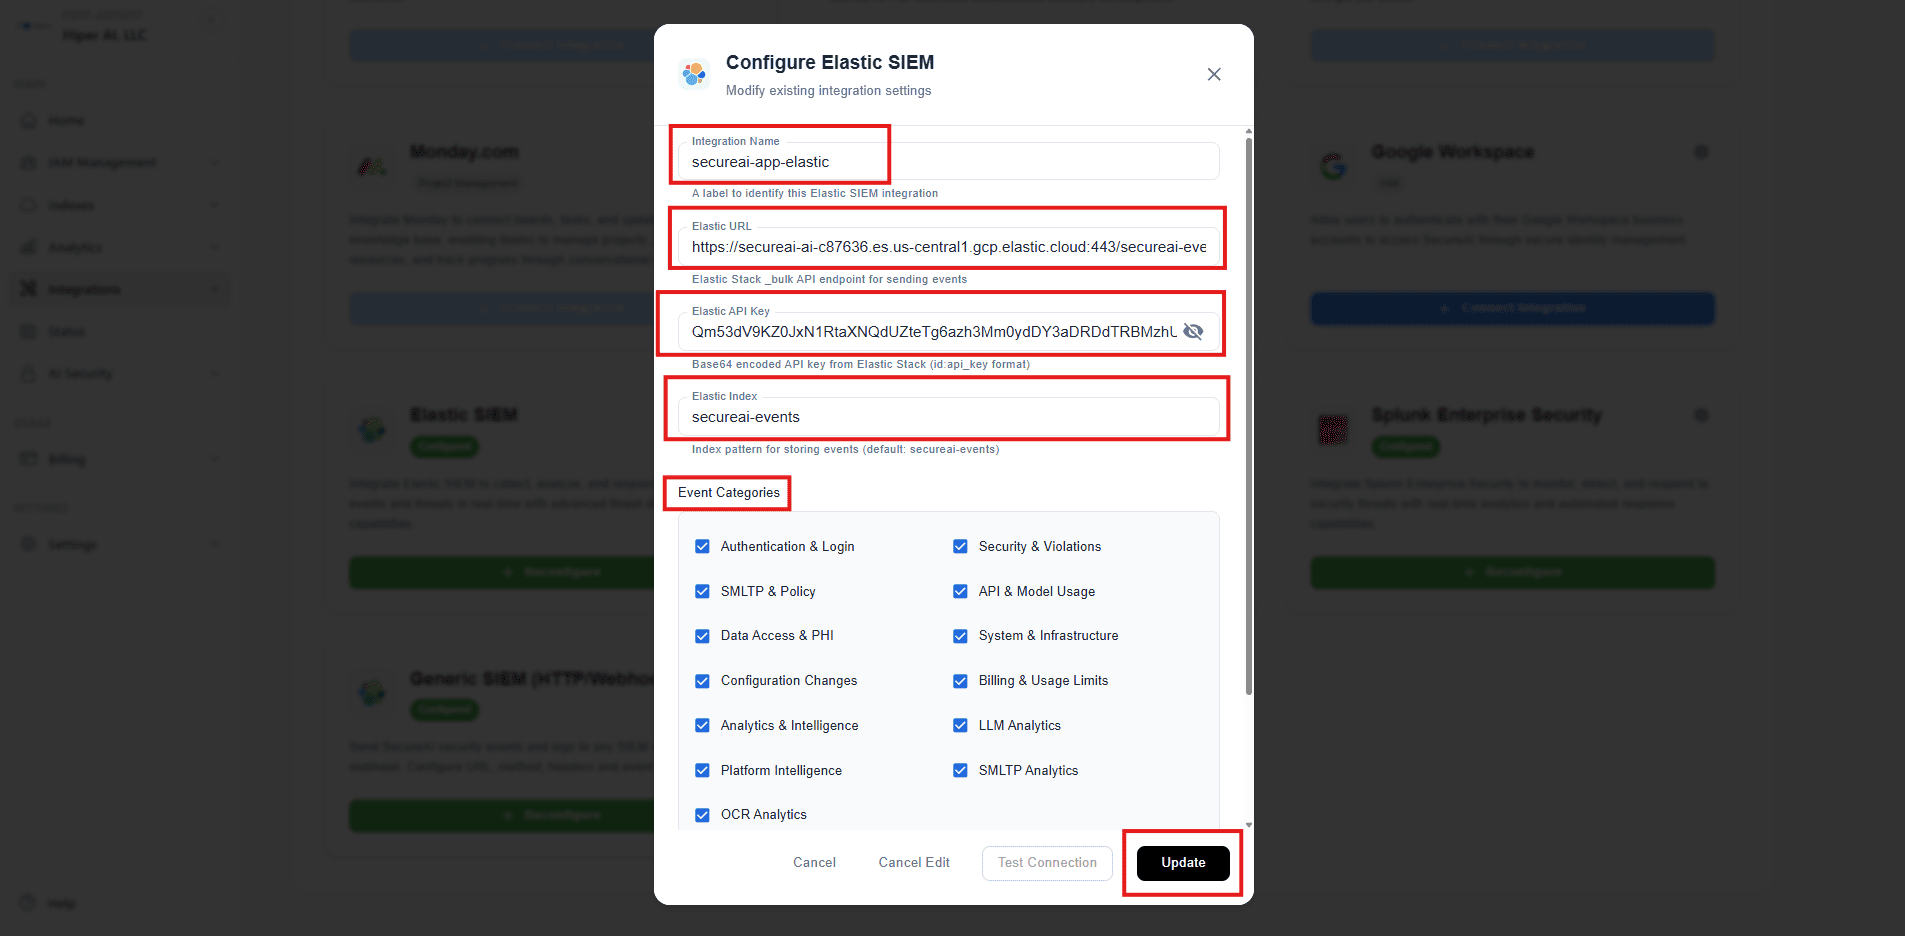
Ahora, ingrese los detalles de Elastic en el panel de integraciones de SecureAI.- En su panel de SecureAI, navegue hasta Integraciones.
- Localice la tarjeta de integración Elastic SIEM y haga clic en Configurar.
- Complete los campos de configuración de la siguiente manera:
- Nombre de integración:
secureai-app-elastic - URL elástica: pegue el endpoint que copió en el Paso 1.
- Clave API elástica: pegue la clave API codificada en Base64 que creó en el Paso 2.
- Índice elástico:
secureai-events - Seleccione categorías de eventos: marque todas las casillas para reenviar todos los tipos de eventos disponibles a su Elastic SIEM.
- Nombre de integración:
- Haga clic en Actualizar para guardar la configuración.
Paso 5: Pruebe y verifique la conexión
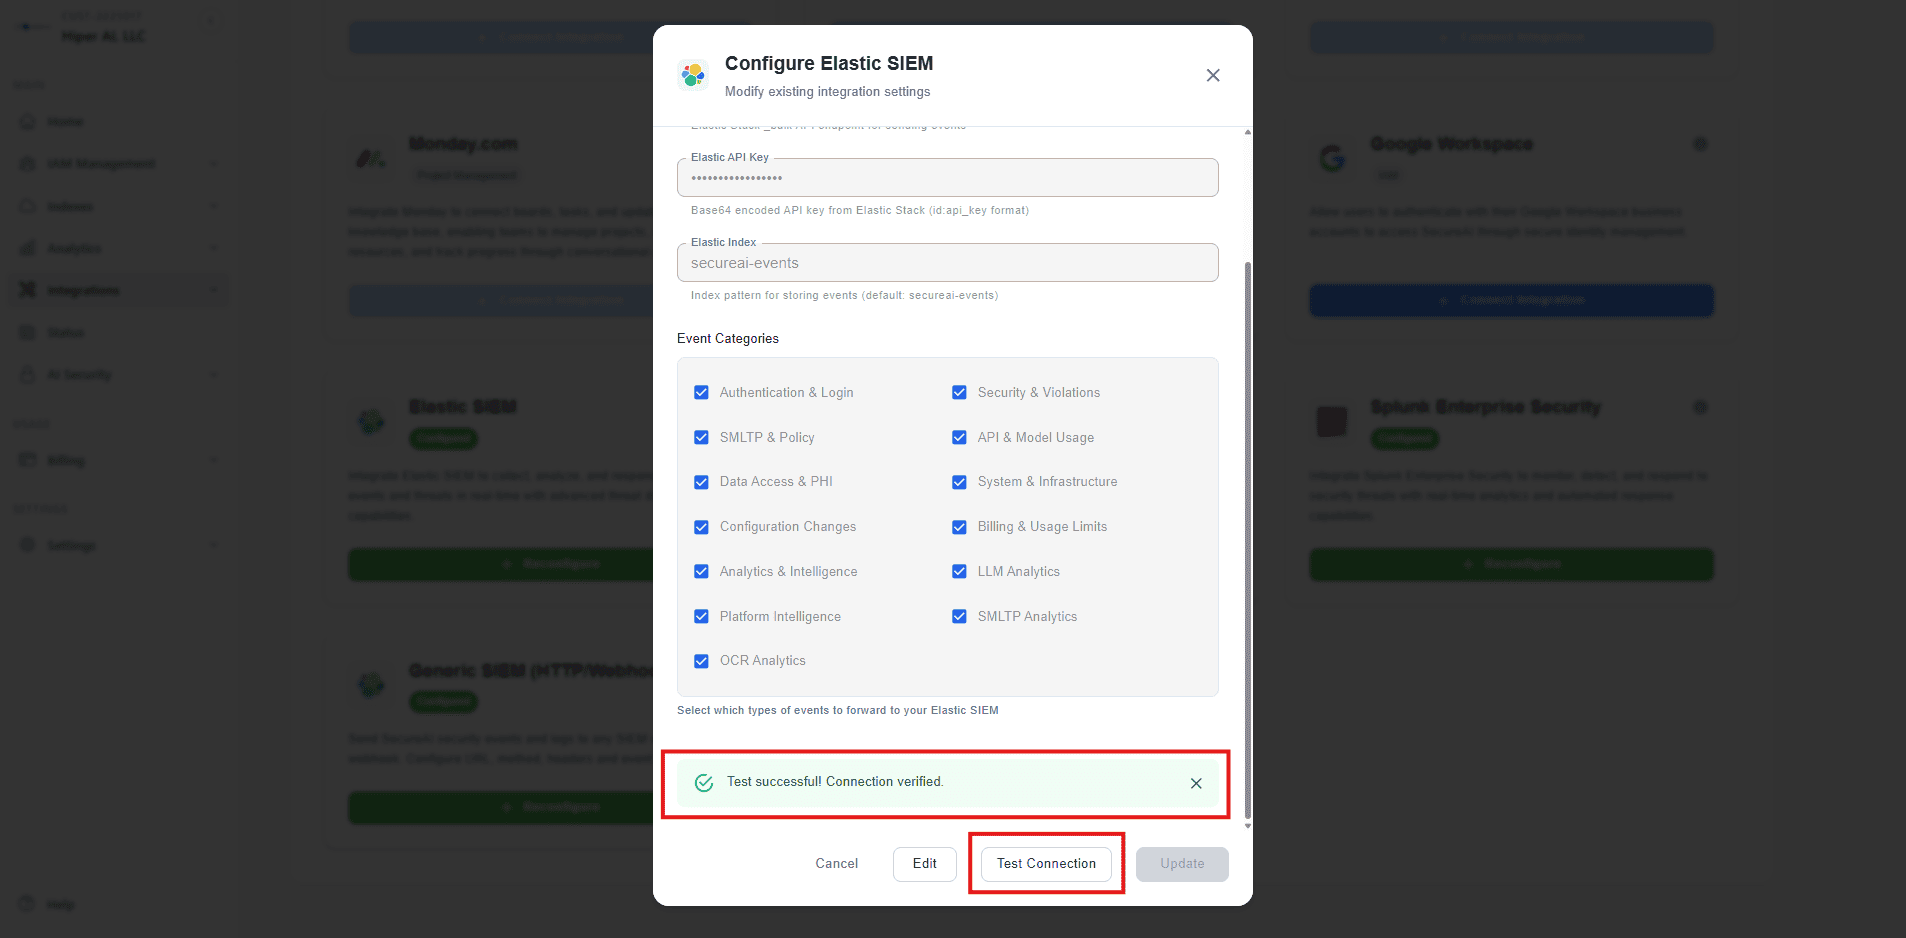
Después de guardar la configuración, pruebe la conexión para asegurarse de que SecureAI pueda comunicarse con su instancia Elastic.- En el modo de configuración de integración, haga clic en el botón Probar conexión.
- Debería ver un mensaje de éxito: “¡Prueba exitosa! Conexión verificada”.
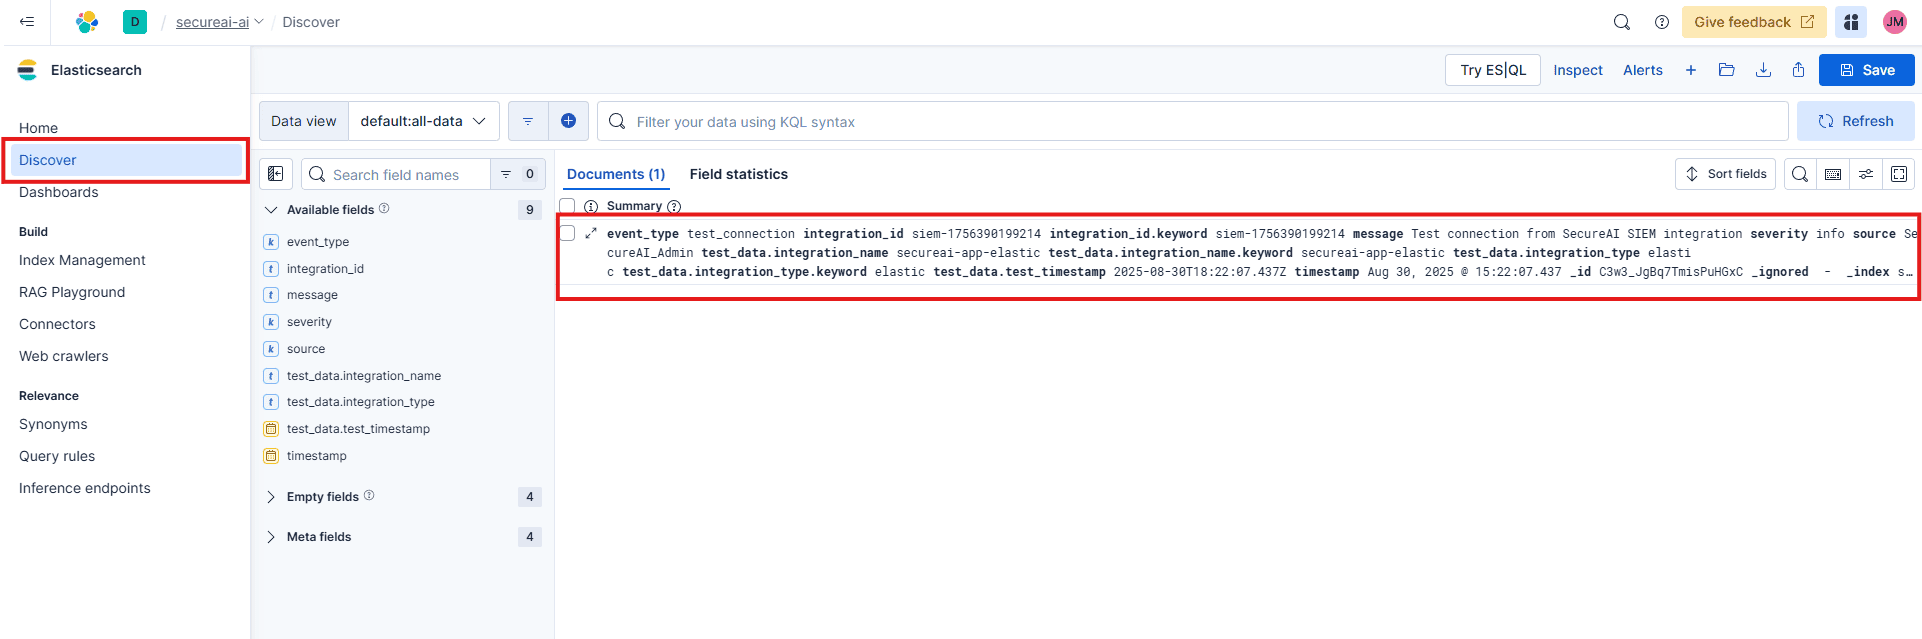
- Para confirmar que se recibieron los datos de la prueba, vaya a Descubrir en Kibana.
- Seleccione la vista de datos
secureai-events(patrón de índice). - Debería ver un registro de eventos de prueba de SecureAI, que confirma que la integración está funcionando correctamente.
secureai-events a medida que ocurran.