

SharePoint & OneDrive — Add from SharePoint
With this integration, your users attach files from SharePoint sites (including Teams sites), OneDrive, and Shared with me directly from the chat, using the Add from SharePoint option in the attach button. Setup is self-serve: an administrator in your organization registers SecureAI as an application in your own Microsoft Entra ID directory and enters the identifiers in Admin → Integrations → Files. There is no need to open a ticket or wait for Hiper AI: the option appears in the chat as soon as you save the configuration. Estimated time: 10 minutes.How it works
- The user clicks Attach → Add from SharePoint. The first time, Microsoft asks them to sign in with their own Microsoft 365 account.
- The SecureAI browser opens on top of Microsoft Graph: sites, libraries, folders, search, and files shared with the user. The user selects one or more files.
- The user’s browser downloads only the selected files, using the user’s own token, and attaches them to the message.
- The file follows the same path as any attachment: it goes through DLP and your organization’s policies before reaching a model.
Delegated permissions, never application permissions. SecureAI always acts on behalf of the signed-in user: a user only sees and attaches what they can already open in SharePoint. The application is a “single-page application” (SPA) with no client secret, and SecureAI does not read anything in the background.
Prerequisites
- An Entra ID role that allows registering applications and granting admin consent for Microsoft Graph permissions (for example Cloud Application Administrator or Global Administrator).
- SecureAI administrator access, with Administrator permission on the Integrations section.
- A SecureAI plan that includes Attach from Drive / SharePoint. Without it you can leave the configuration ready, but users will not see the option.
Step 1: Copy the redirect URI from SecureAI
- Sign in to SecureAI as an administrator.
- Go to Admin → Integrations and filter by the Files category.
- On the SharePoint & OneDrive card, click Connect integration.
- In the 1. Register SecureAI in Microsoft Entra ID section, click Copy next to the Redirect URI.
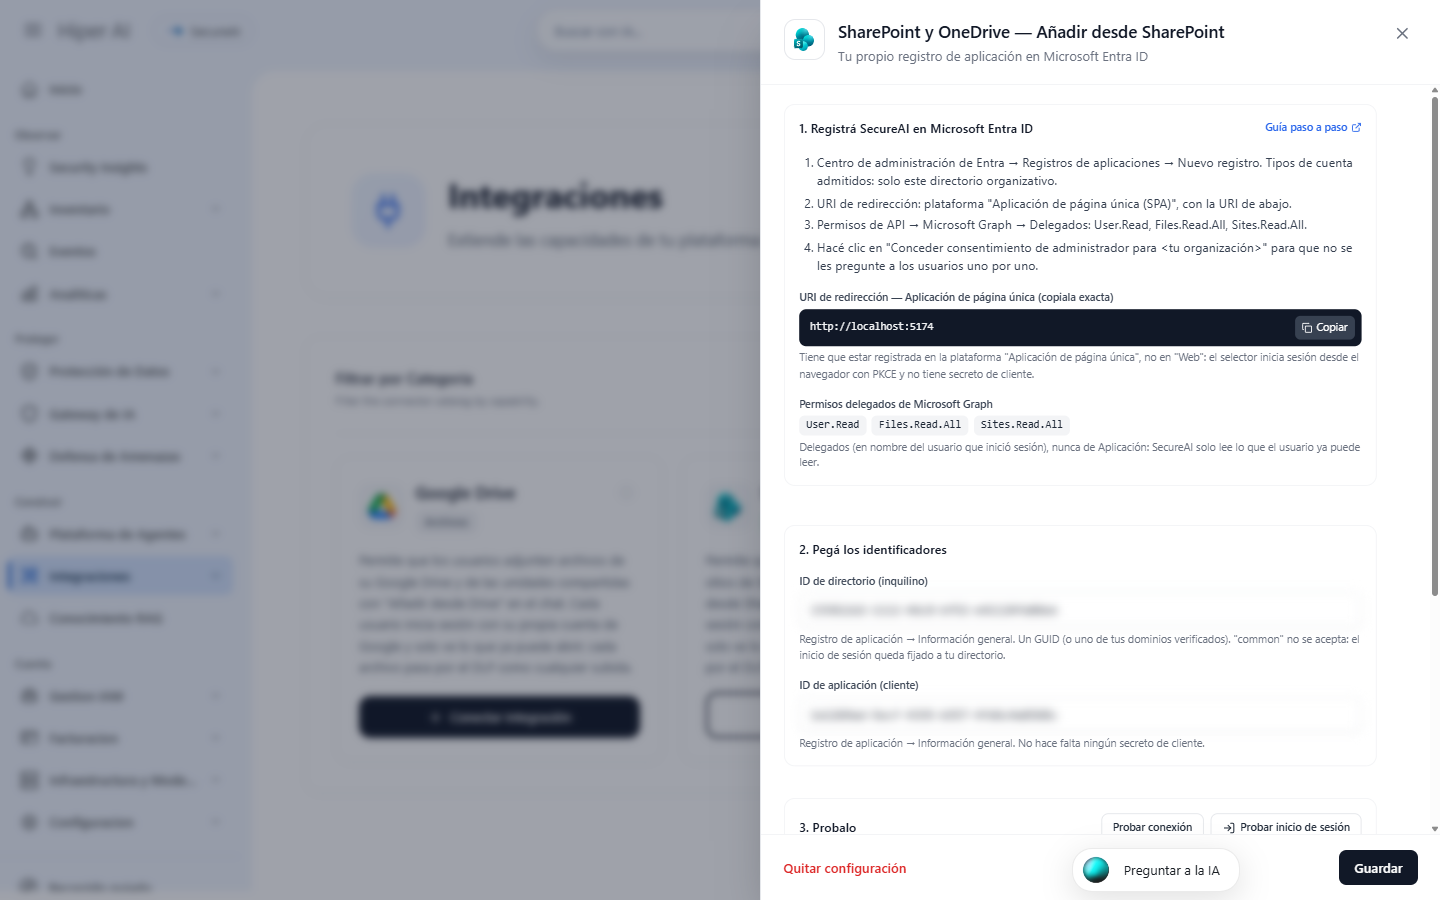
https://<your-company>.hiperai.ai. Always use the one shown by your instance: it must match exactly.
Step 2: Register the application in Entra ID
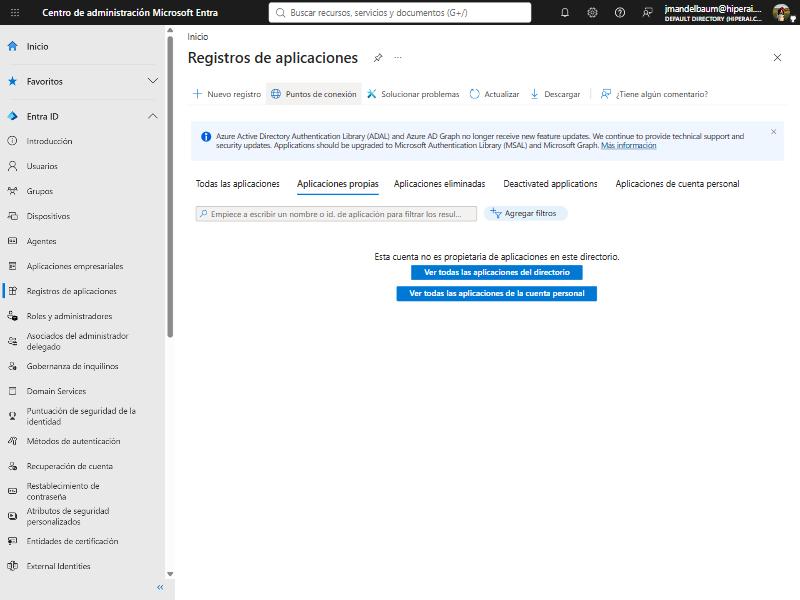
- Open the Microsoft Entra admin center and go to Entra ID → App registrations.
- Click New registration.
- Fill in:
- Name: for example
SecureAI — Add from SharePoint. - Supported account types: Accounts in this organizational directory only (single tenant).
- Redirect URI: in the dropdown choose Single-page application (SPA) and paste the URI you copied in step 1.
- Name: for example
- Click Register.
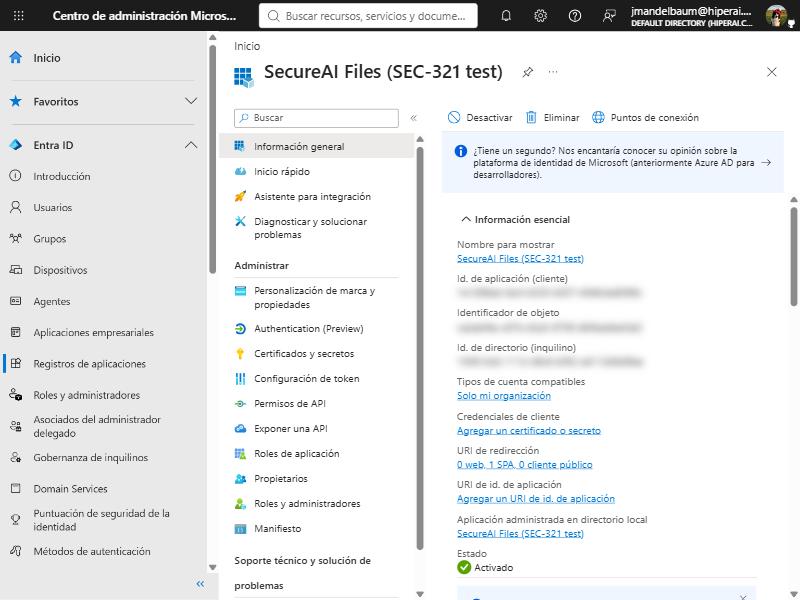
- On the application’s Overview, copy the Application (client) ID and the Directory (tenant) ID. You do not need to create any client secret.
Step 3: Add the Microsoft Graph permissions
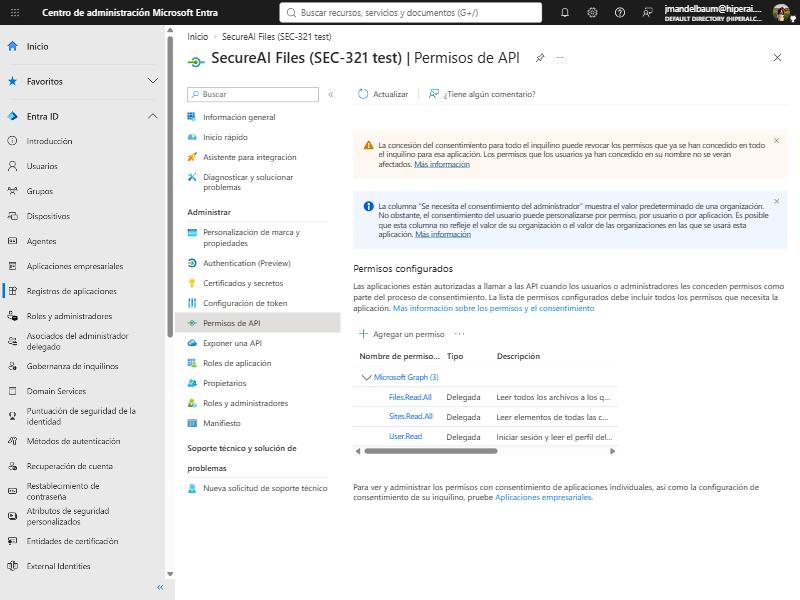
- In the application, go to API permissions → Add a permission → Microsoft Graph → Delegated permissions.
- Search for and select:
Files.Read.All— read the files the user has access to.Sites.Read.All— list and search the SharePoint sites the user has access to.
- Click Add permissions.
User.Readis already added by default; leave it.
Step 4: Grant admin consent
- In API permissions, click Grant admin consent for <your organization> and confirm with Yes.
- All three permissions must show the status Granted for <your organization>.
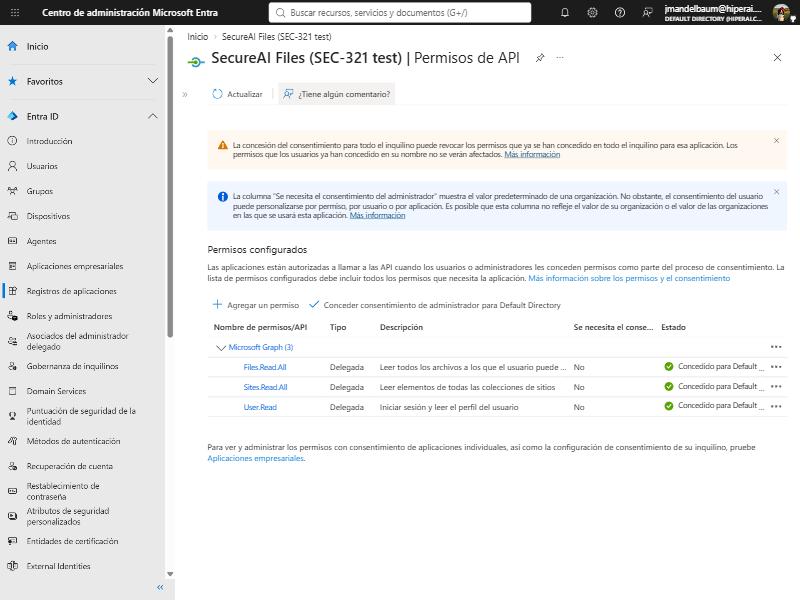
AADSTS65001 error if your organization does not allow users to consent).
Step 5: Enter, test, and enable in SecureAI
- Go back to the SharePoint & OneDrive drawer in SecureAI.
- Under 2. Paste the identifiers, paste the Directory (tenant) ID and the Application (client) ID.
- Under 3. Test it:
- Test connection verifies from SecureAI’s servers that the directory exists.
- Try signing in opens the same Microsoft window your users will see: sign in with your account. SecureAI confirms that the redirect URI is of the SPA type, that
Files.Read.AllandSites.Read.Allhave consent, and that Microsoft Graph responds.
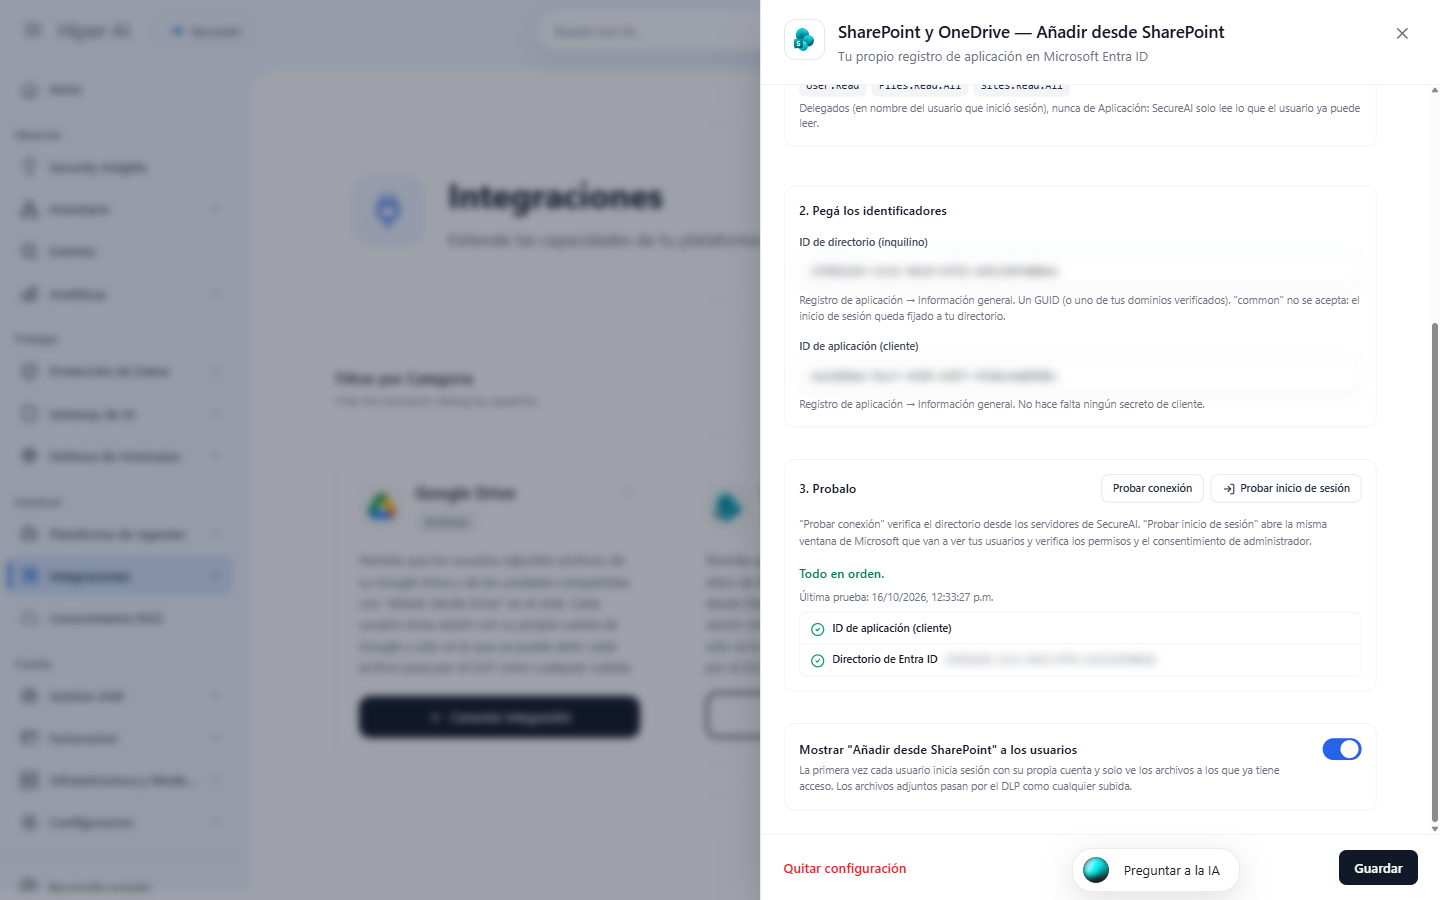
- Under 4., leave Show “Add from SharePoint” to users turned on and click Save.
Step 6: How your users use it
- In the chat, the user clicks the attach button and chooses Add from SharePoint.
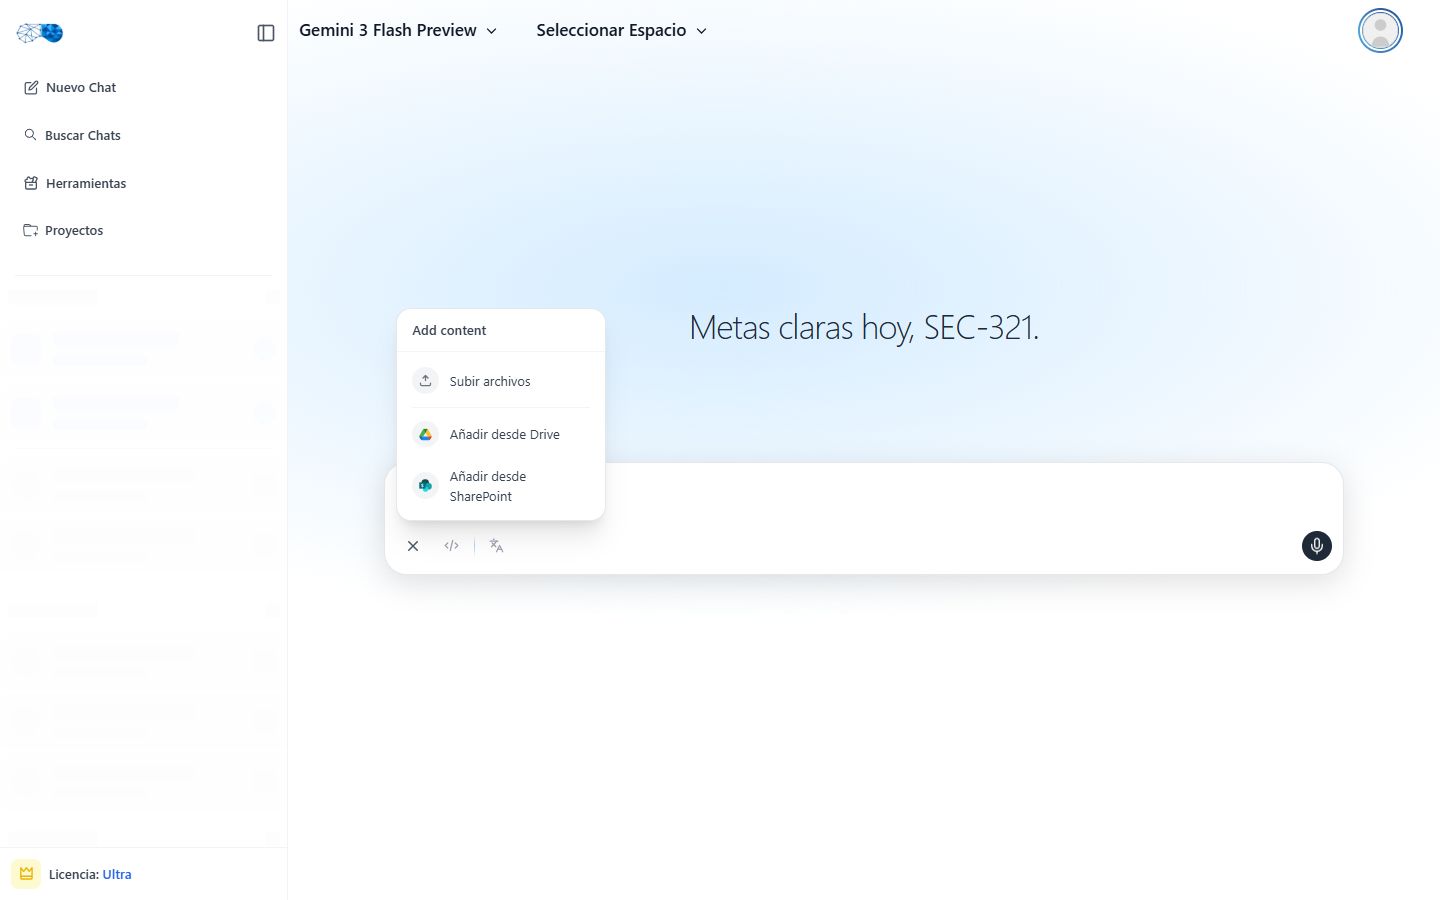
- The first time, they click Sign in with Microsoft and choose their organization account.
- They browse Sites, Shared, or use search, select one or more files, and click Add.
- The files appear attached to the message, with the SharePoint icon.
Restrict who can use it (optional)
To allow only certain users or groups to use Add from SharePoint:- In Entra, go to Enterprise applications and open the application you registered.
- Under Properties, turn on Assignment required? and save.
- Under Users and groups, assign the users or groups that should have access.
AADSTS50105 when signing in and cannot attach files.