

Google Drive — Add from Drive
With this integration, your users attach files from Google Drive (My Drive, Shared with me, and shared drives) directly from the chat, using the Add from Drive option in the attach button. Setup is self-serve: an administrator in your organization creates an OAuth client and an API key in your own Google Cloud project and enters them in Admin → Integrations → Files. There is no need to open a ticket or wait for Hiper AI: the option appears in the chat as soon as you save the configuration. Estimated time: 10 minutes.How it works
- The user clicks Attach → Add from Drive. The first time, Google asks them to sign in with their own account and to authorize SecureAI.
- The official Google Drive picker (Google Picker) opens. The user selects one or more files.
- The user’s browser downloads only the selected files, using the user’s own token, and attaches them to the message. Google documents are exported to Office formats (Docs →
.docx, Sheets →.xlsx, Slides →.pptx; everything else, to PDF). - The file follows the same path as any attachment: it goes through DLP and your organization’s policies before reaching a model.
SecureAI never sees your entire Drive. The
drive.file scope is used: SecureAI can only read the files that each user selects in the picker, and nothing else. There is no service account, no domain-wide delegation, and no background reading: a user can only attach what they can already open in Drive.Prerequisites
- A Google Cloud project within your Google Workspace organization, and permissions to enable APIs, configure Google Auth Platform, and create credentials in it (for example, the Owner or Editor role on the project).
- SecureAI administrator access, with Administrator permission on the Integrations section.
- A SecureAI plan that includes Attach from Drive / SharePoint. Without it you can leave the configuration ready, but users will not see the option.
Step 1: Copy the addresses from SecureAI
- Sign in to SecureAI as an administrator.
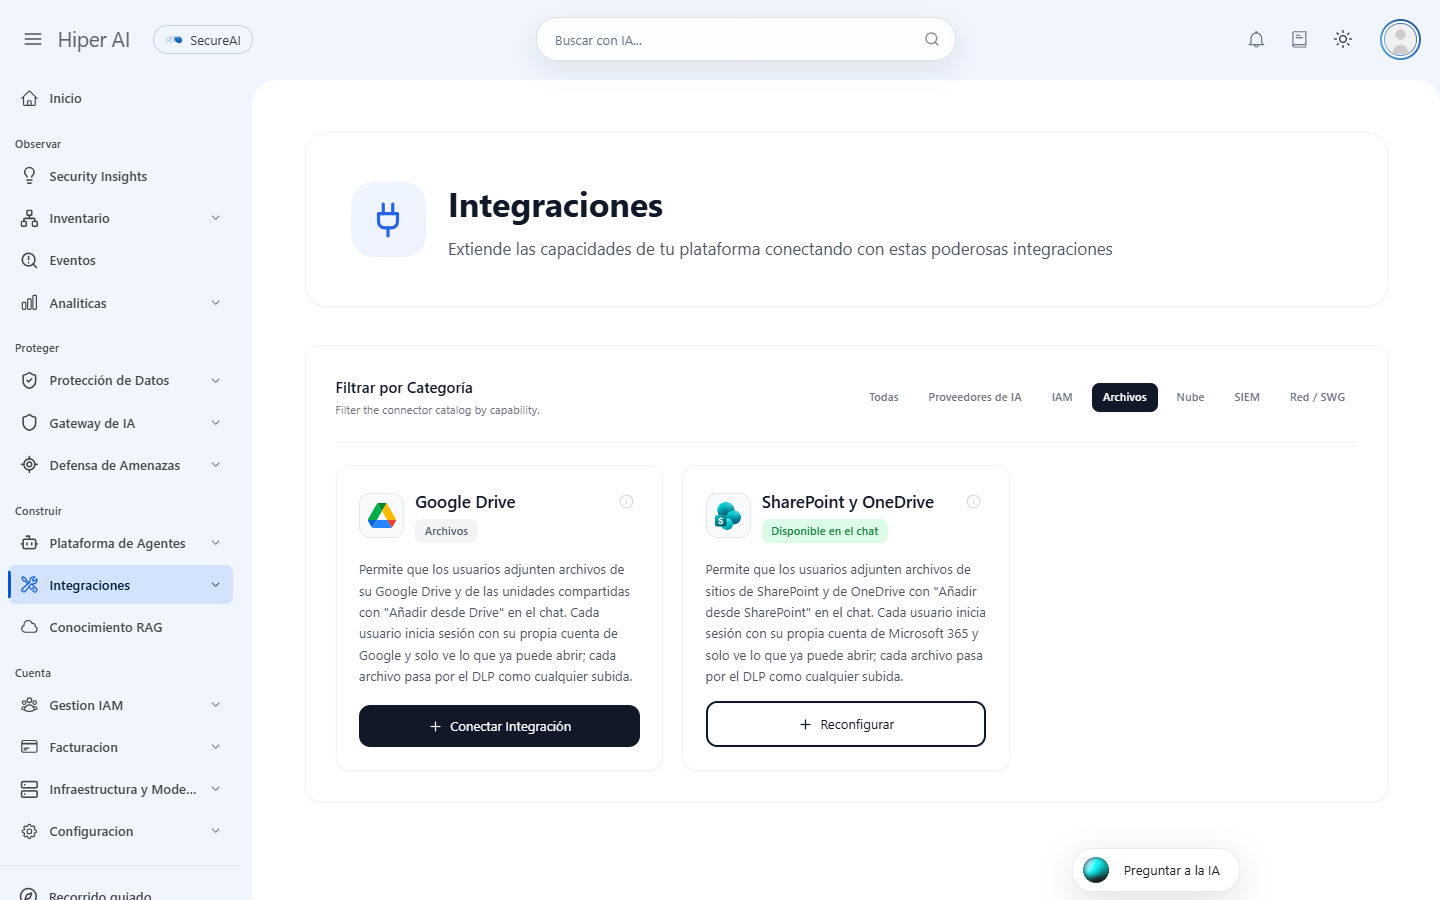
- Go to Admin → Integrations and filter by the Files category.
- On the Google Drive card, click Connect integration.
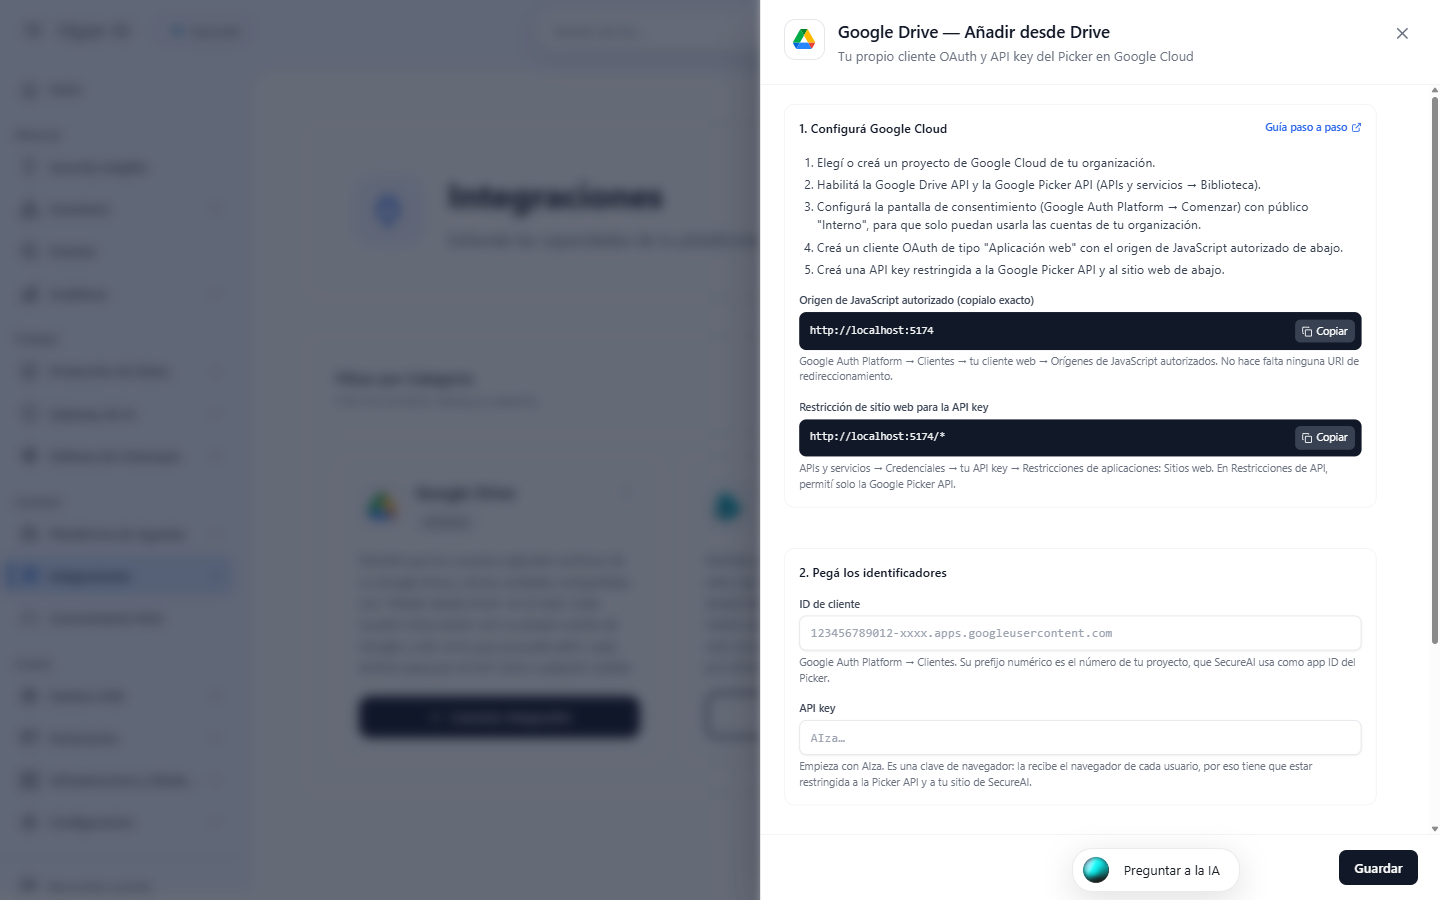
- In the 1. Set up Google Cloud section you will find the two values you need in Google Cloud, each with its own Copy button:
- Authorized JavaScript origin: the address of your instance, for example
https://<your-company>.hiperai.ai. - Website restriction for the API key: the same address ending in
/*.
- Authorized JavaScript origin: the address of your instance, for example
https:// and with no trailing / on the origin.
Step 2: Choose the project and enable the APIs
- Open the Google Cloud console and, in the project selector in the top bar, choose a project from your organization (or create a new one, for example
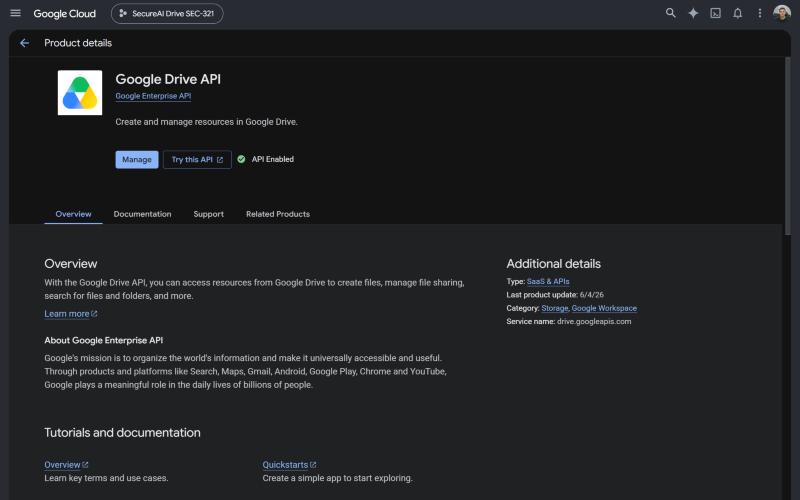
SecureAI Drive). - Go to APIs & Services → Library, search for Google Drive API, and click Enable.
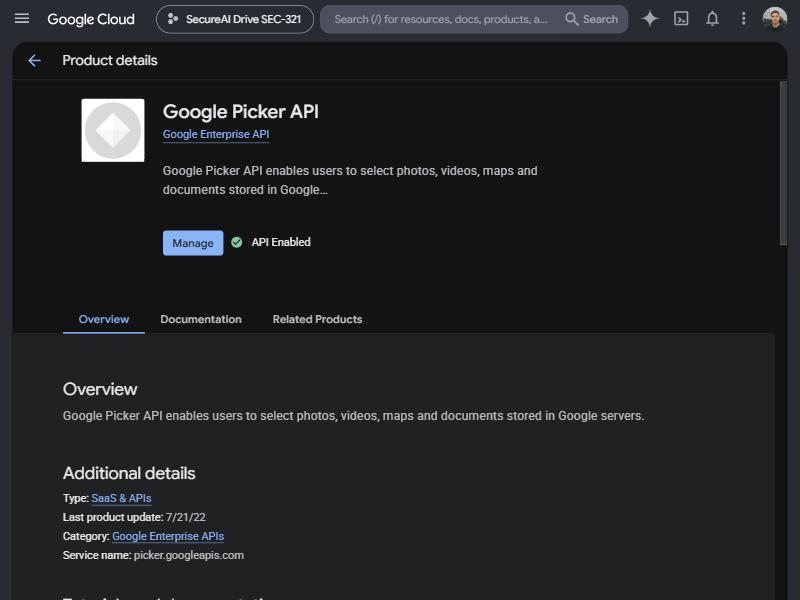
- Repeat for Google Picker API.
Step 3: Configure the consent screen
- Go to Google Auth Platform (menu APIs & Services → OAuth consent screen). If the project does not have it configured yet, click Get started.
- Fill in App name (for example
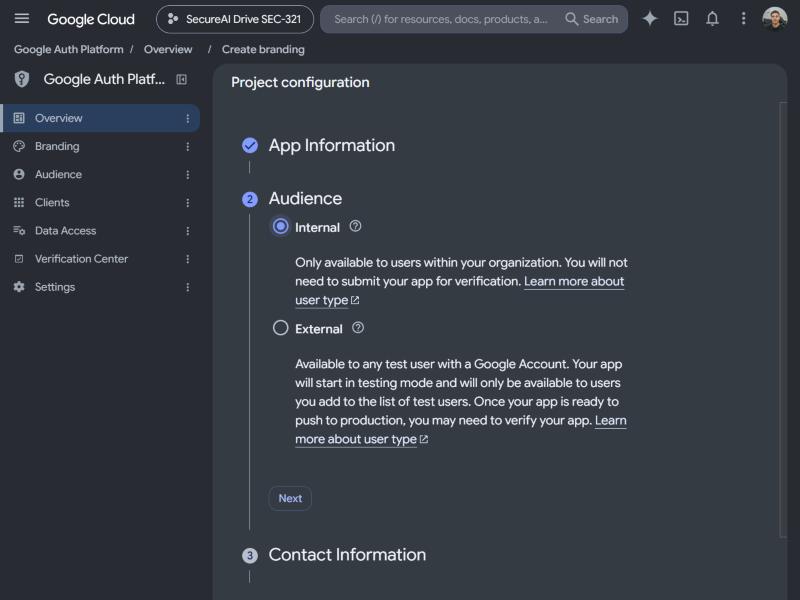
SecureAI) and the User support email. - Under Audience, choose Internal: only accounts in your Google Workspace organization will be able to authorize the app, and Google does not require verification.
- Fill in the contact email, accept the user data policy, and click Create.
drive.file, a non-sensitive scope.
Step 4: Create the OAuth client
- In Google Auth Platform → Clients, click Create client.
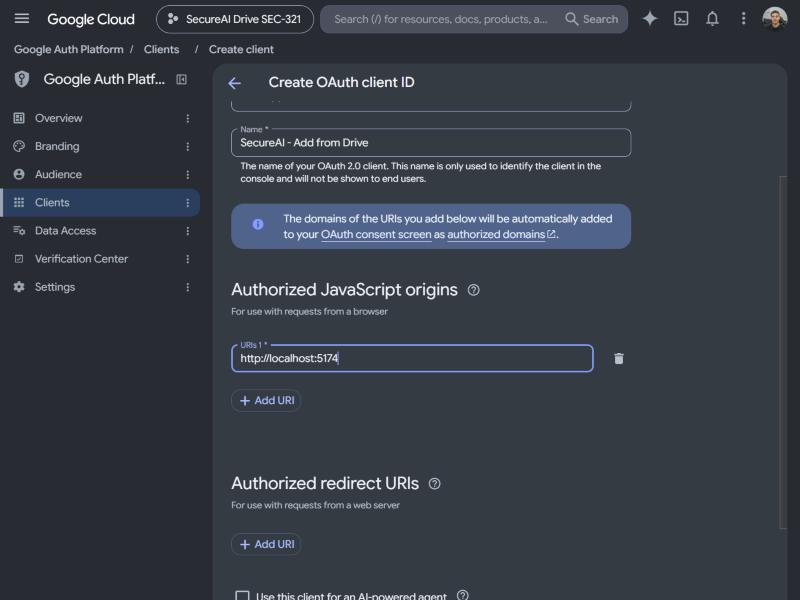
- Under Application type, choose Web application and give it a name (for example
SecureAI — Add from Drive). - Under Authorized JavaScript origins, click Add URI and paste the Authorized JavaScript origin you copied in step 1.
- Leave the Authorized redirect URIs empty: the picker does not use them.
- Click Create.
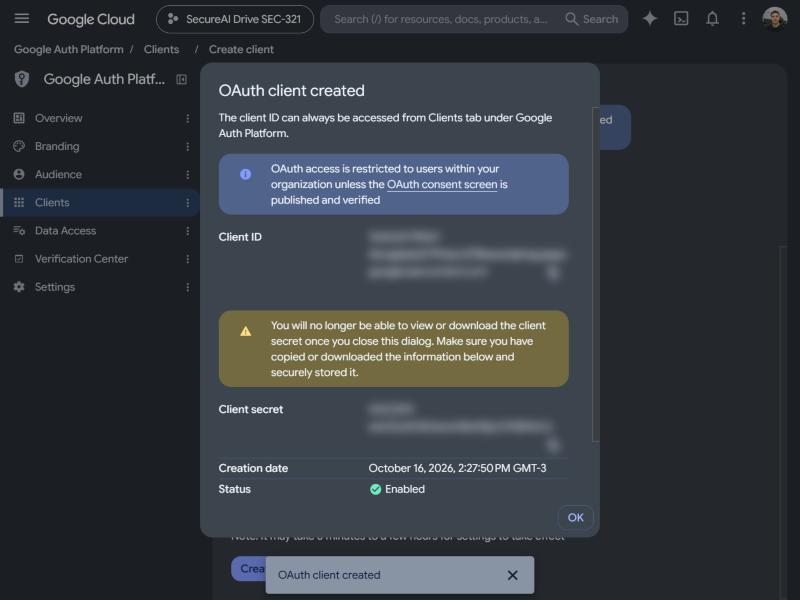
- Copy the Client ID (it ends in
.apps.googleusercontent.com). This client does not need a secret: do not copy it or enter it anywhere.
If your organization already uses a Google web client for Google Workspace sign-in in SecureAI, you can reuse it: add the JavaScript origin to that same client.
Step 5: Create and restrict the API key
- Go to APIs & Services → Credentials and click Create credentials → API key.
- Open the newly created key (Edit API key):
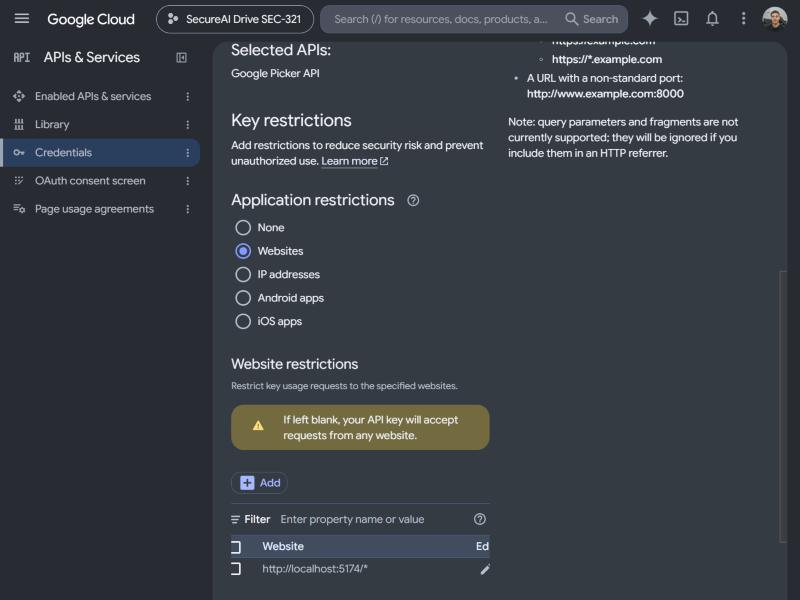
- Under Application restrictions, choose Websites and add the Website restriction you copied in step 1 (the address ending in
/*). - Under API restrictions, choose Restrict key and select only Google Picker API.
- Under Application restrictions, choose Websites and add the Website restriction you copied in step 1 (the address ending in
- Click Save and copy the key (it starts with
AIza).
Step 6: Enter, test, and enable in SecureAI
- Go back to the Google Drive drawer in SecureAI.
- Under 2. Paste the identifiers, paste the Client ID and the API key.
- Under 3. Test it:
- Test connection verifies from SecureAI’s servers that the API key is valid, that it accepts requests from your instance, and that it belongs to the same project as the OAuth client.
- Try signing in opens the same Google window your users will see: sign in with your account. SecureAI confirms that the origin is authorized and that the Google Drive API responds.
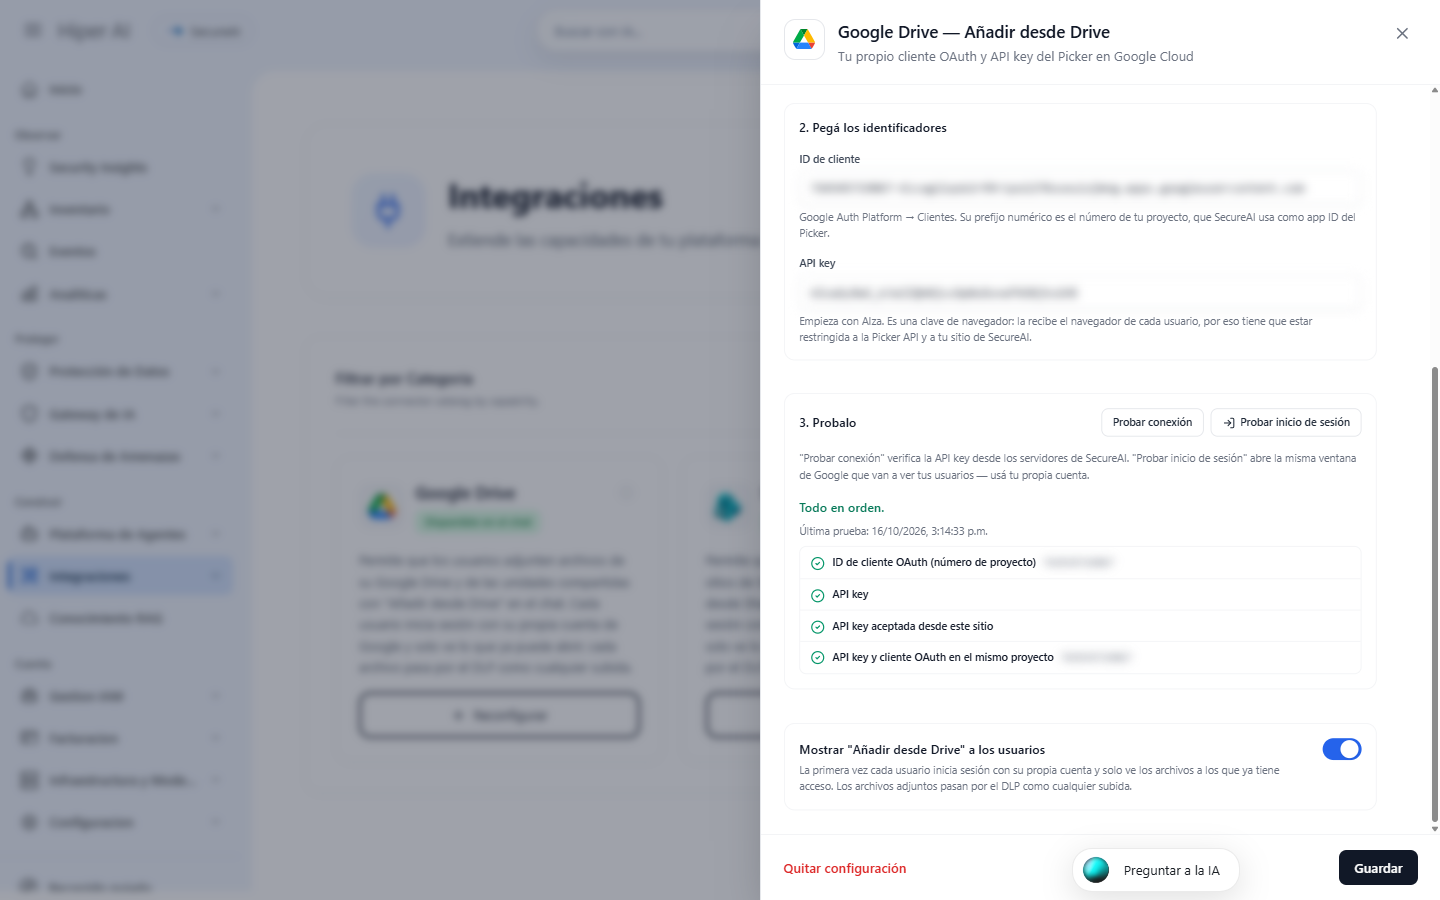
- Under 4., leave Show “Add from Drive” to users turned on and click Save.
Step 7: How your users use it
- In the chat, the user clicks the attach button and chooses Add from Drive.
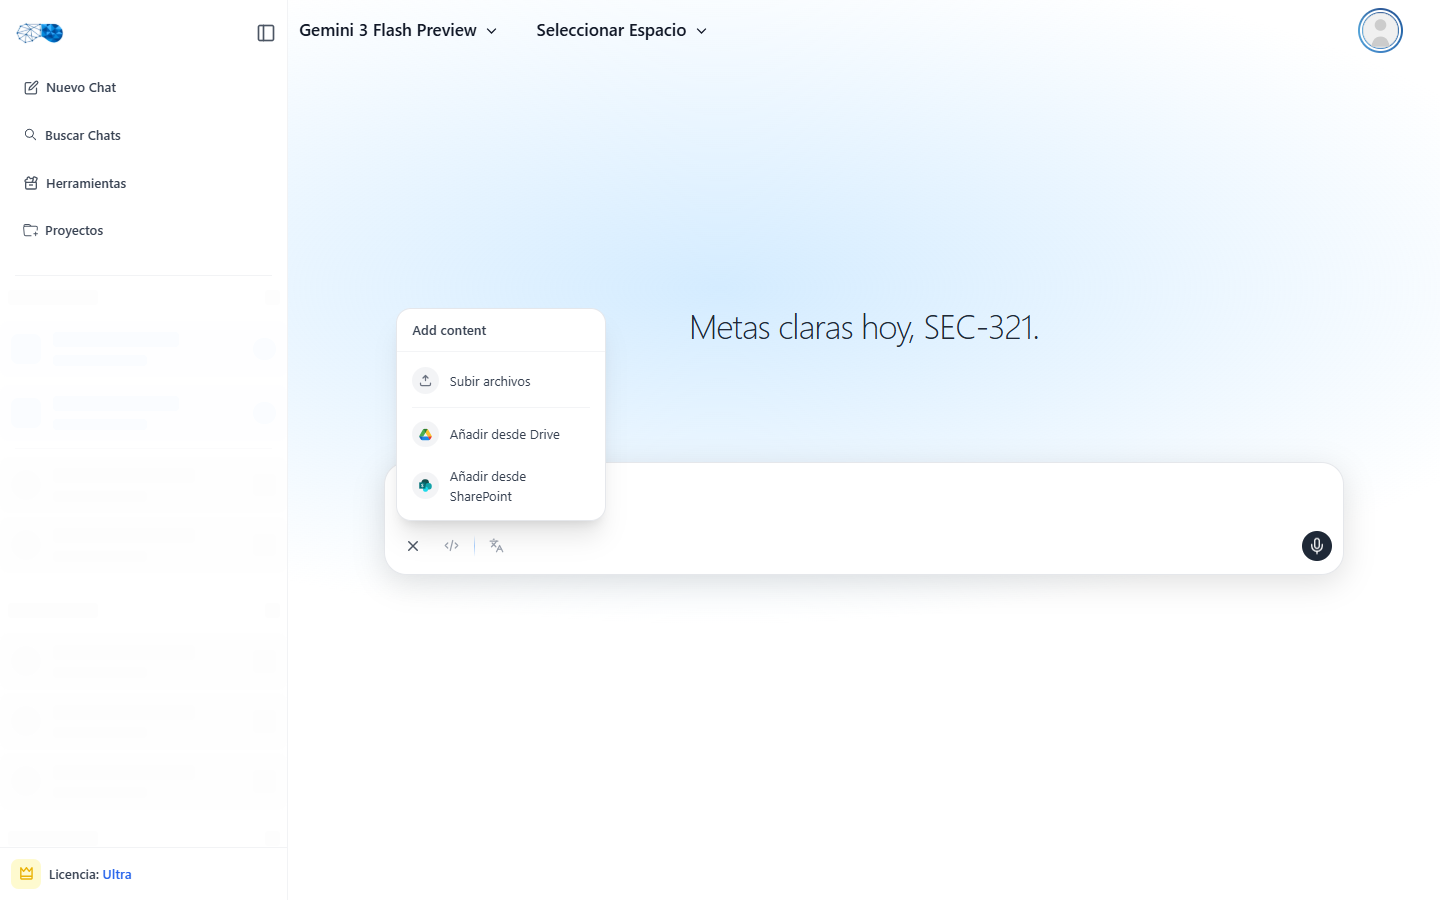
- The first time, Google asks them to choose their account and to authorize SecureAI to see the files they select.
- The Google Drive picker opens, with tabs for My Drive, shared drives, and images. They select one or more files and click Select.
- The files appear attached to the message, with the Google Drive icon.
Troubleshooting
Frequently asked questions
Does it work with shared drives? Yes. The picker has a tab for shared drives; the user sees the drives they are a member of. What permissions does each user give SecureAI? Onlydrive.file: access to the files the user selected in the picker. SecureAI cannot list, search, or read any other file in your Drive.
How do I turn it off? Turn off Show “Add from Drive” to users and save, or click Remove configuration. To also cut off the access users have already granted, delete the OAuth client in Google Cloud.
Hiper AI had already configured Drive for me. Do I need to do anything? No. As long as you do not save a configuration of your own, the card shows Configured by Hiper AI and everything keeps working the same. If you save your own, it replaces that one.
What about the “Google Drive service account” from the previous version? It is no longer used: each download is made with the user’s own token, which is more secure, because a user can never attach a file they cannot open.