> ## Documentation Index
> Fetch the complete documentation index at: https://docs.hiperai.com/llms.txt
> Use this file to discover all available pages before exploring further.
# Splunk Security Integration
> Integration Guide: Connecting Splunk SIEM with HiperAI via HTTP Event Collector (HEC)
# Splunk Security Integration
Integration Guide: Connecting Splunk SIEM with HiperAI
This guide describes the necessary steps to configure Splunk to receive security logs from HiperAI via the HTTP Event Collector (HEC).
## Step 1: Create a New Index
First, we will create a dedicated space to store the application's logs.
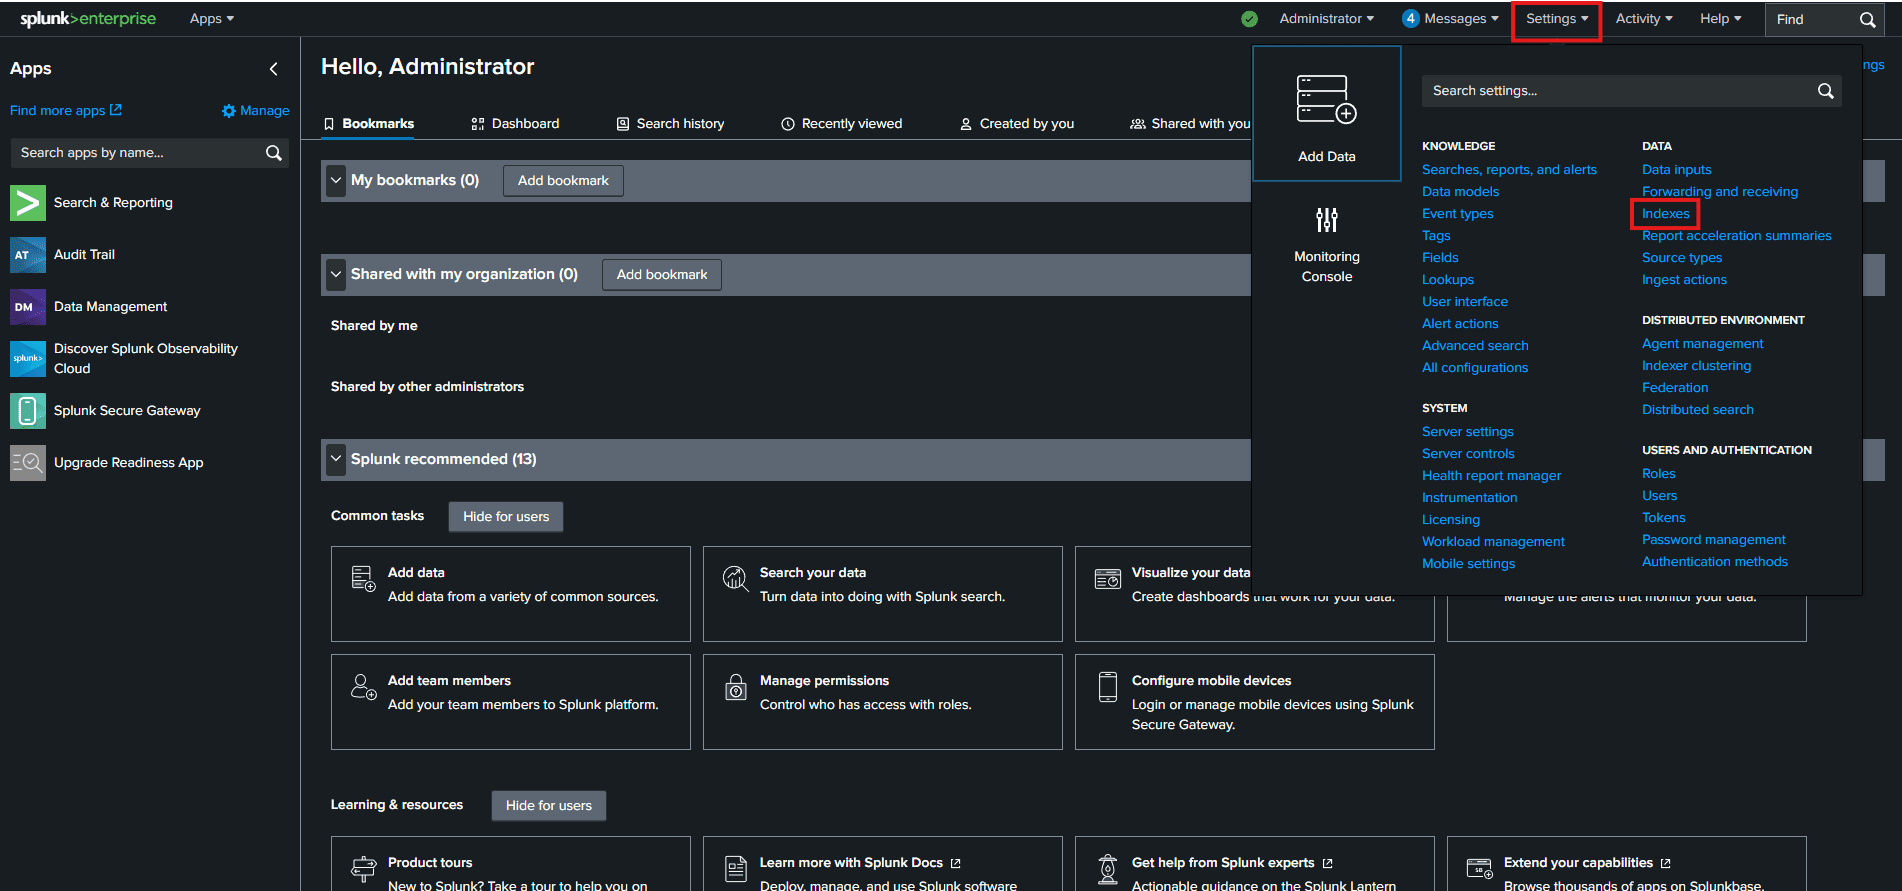
### A. From the Splunk home screen, navigate to Settings > Indexes.
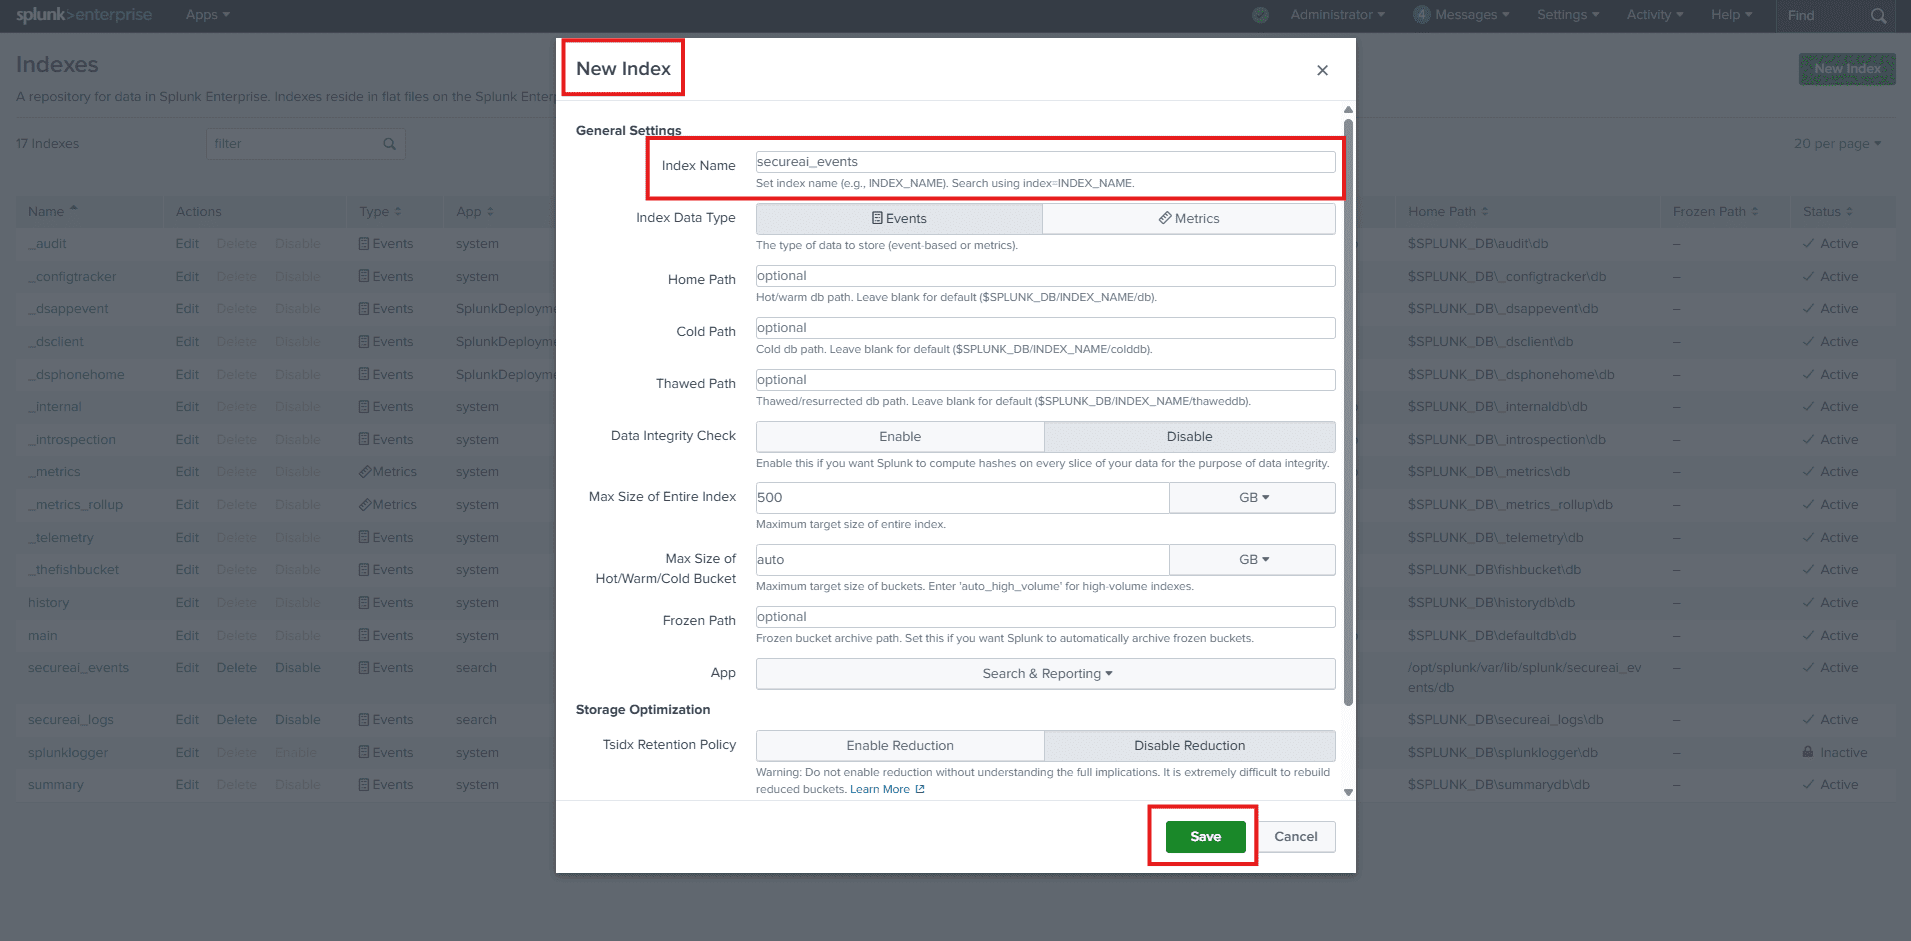
### B. Click the New Index button in the top-right corner.
### C. Configure the index:
* **Index Name**: `secureai_events`
* Leave all other options with their default values for a standard configuration.
* Click **Save**.
Your new index is now created and ready to receive data.
## Step 2: Enable the HTTP Event Collector (HEC)
Next, we will ensure that Splunk is listening for incoming data requests.
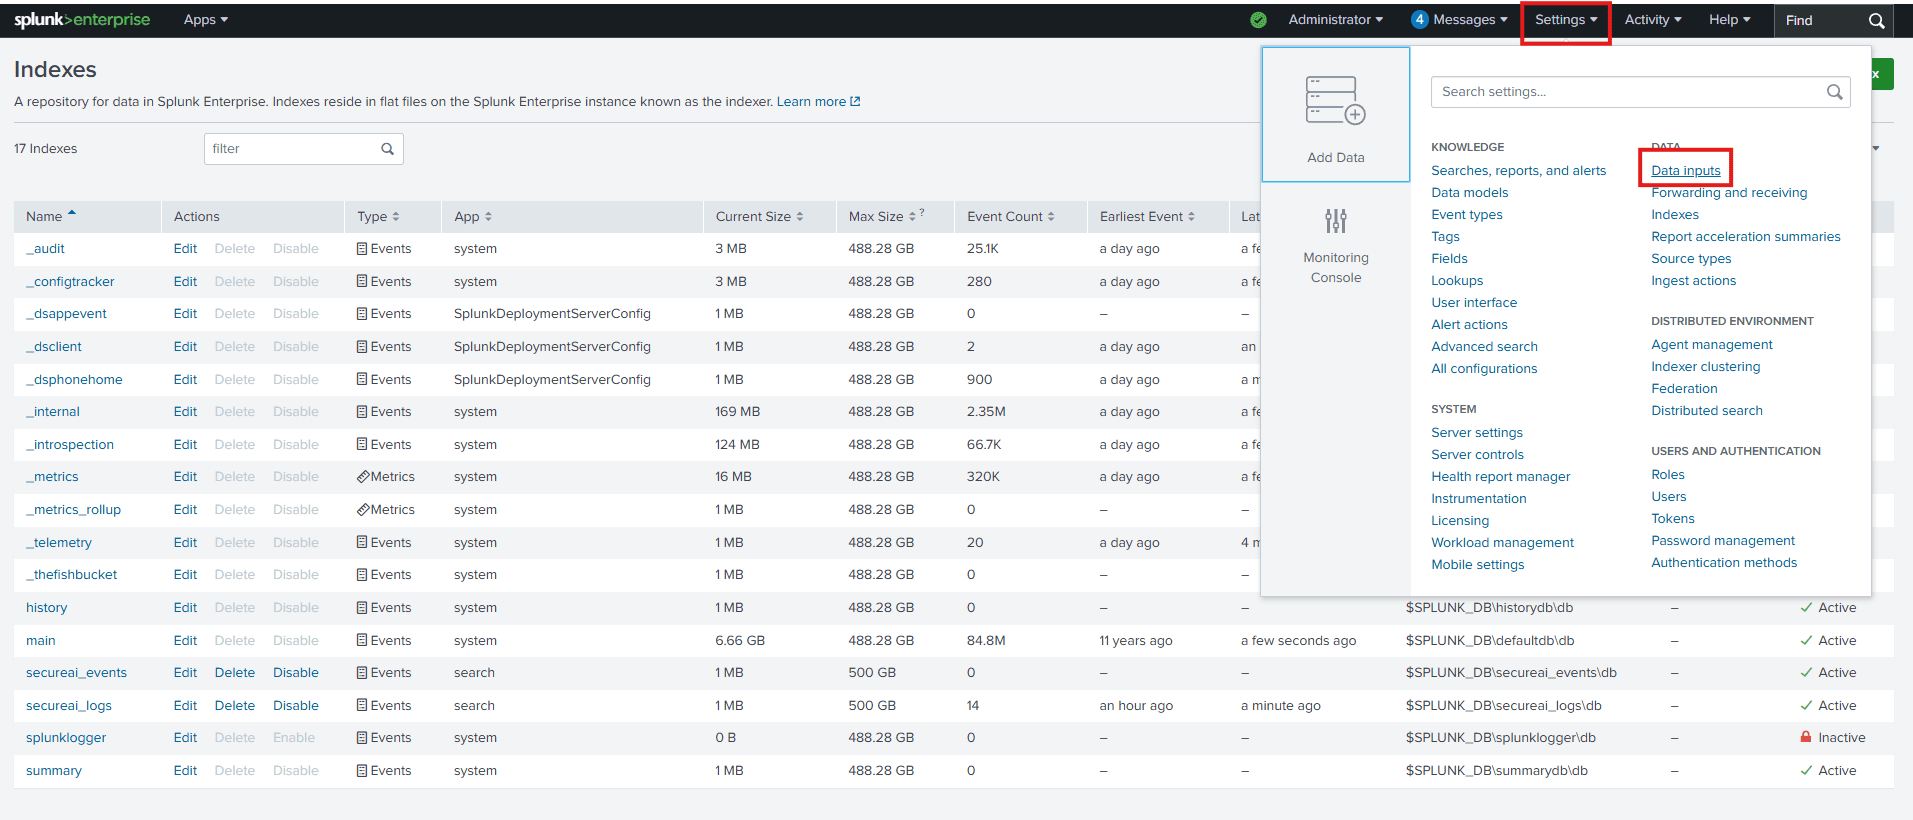
### A. Go to Settings > Data Inputs.
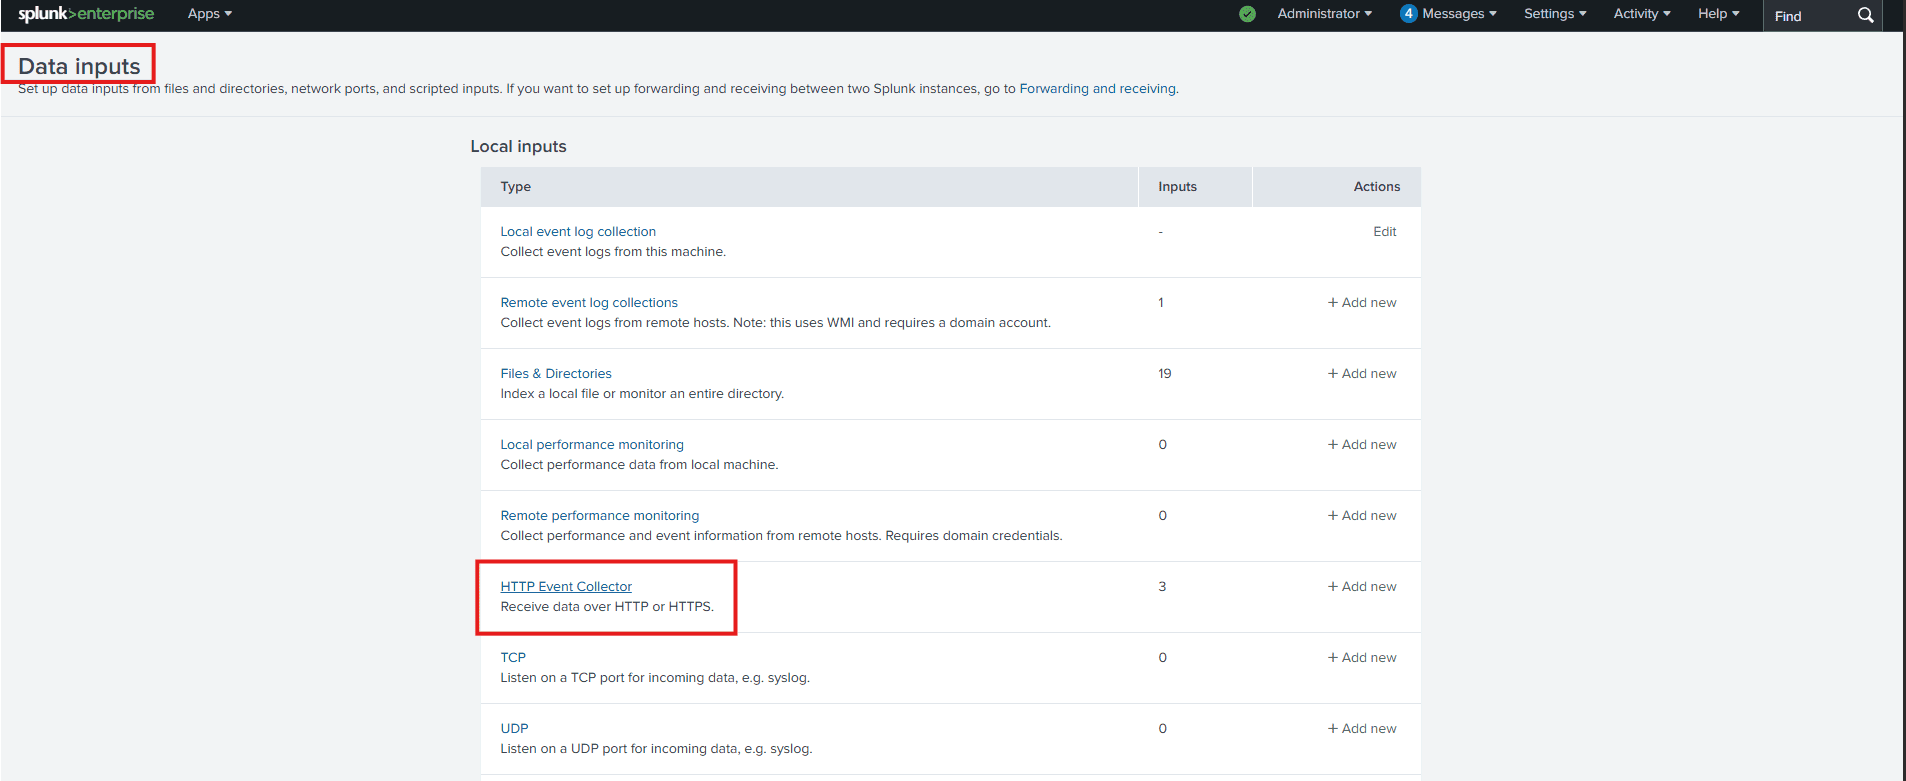
### B. Under "Local inputs," click on HTTP Event Collector.
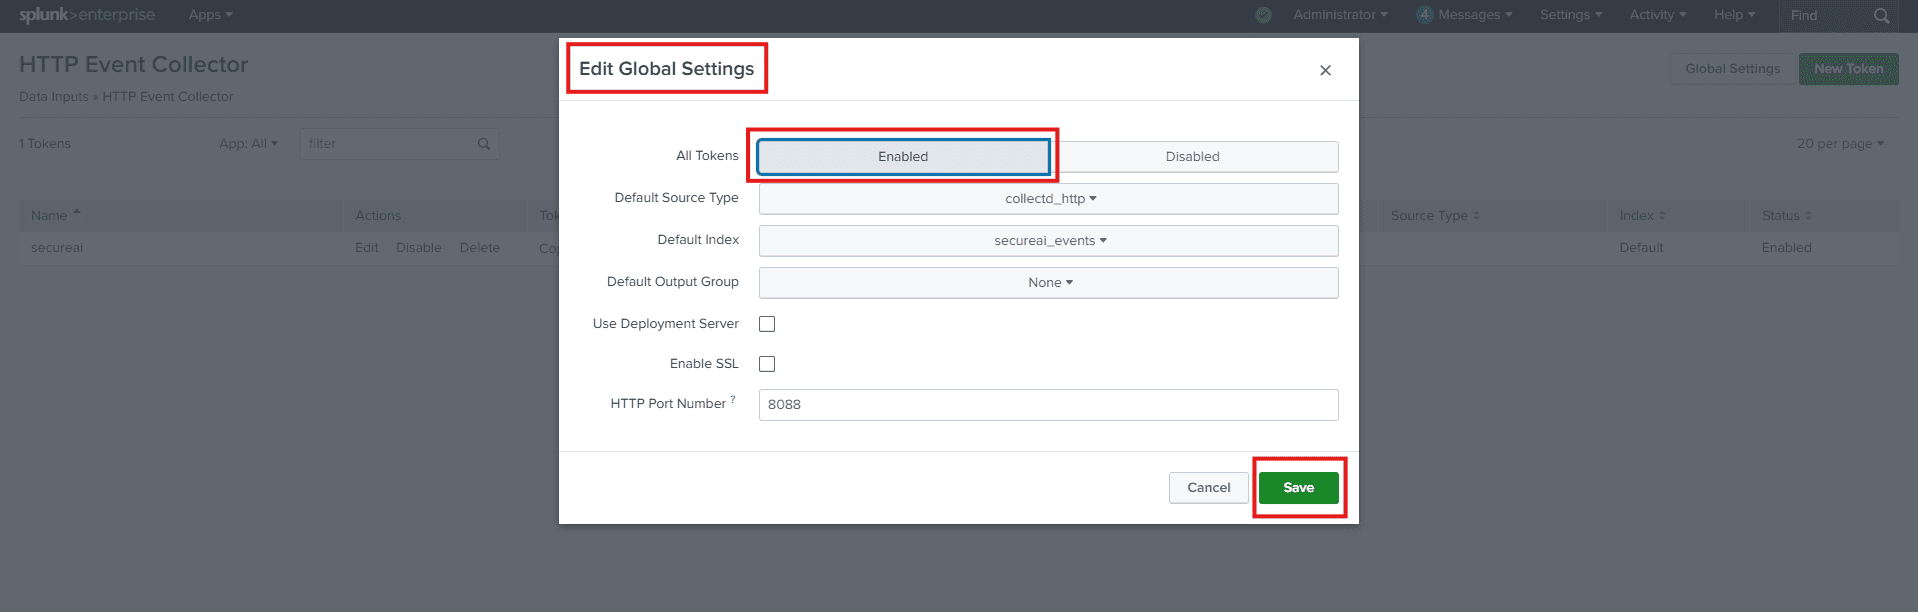
### C. In the top-right corner, click Global Settings.
### D. Verify the following configuration:
* **All Tokens**: Must be Enabled.
* **Enable SSL**: (Optional) This is recommended for production environments but can be disabled for initial testing.
* **HTTP Port Number**: Ensure the port is 8088.
* Click **Save**.
## Step 3: Create the HEC Token
The token is the secure access key that our application will use to authenticate with Splunk.
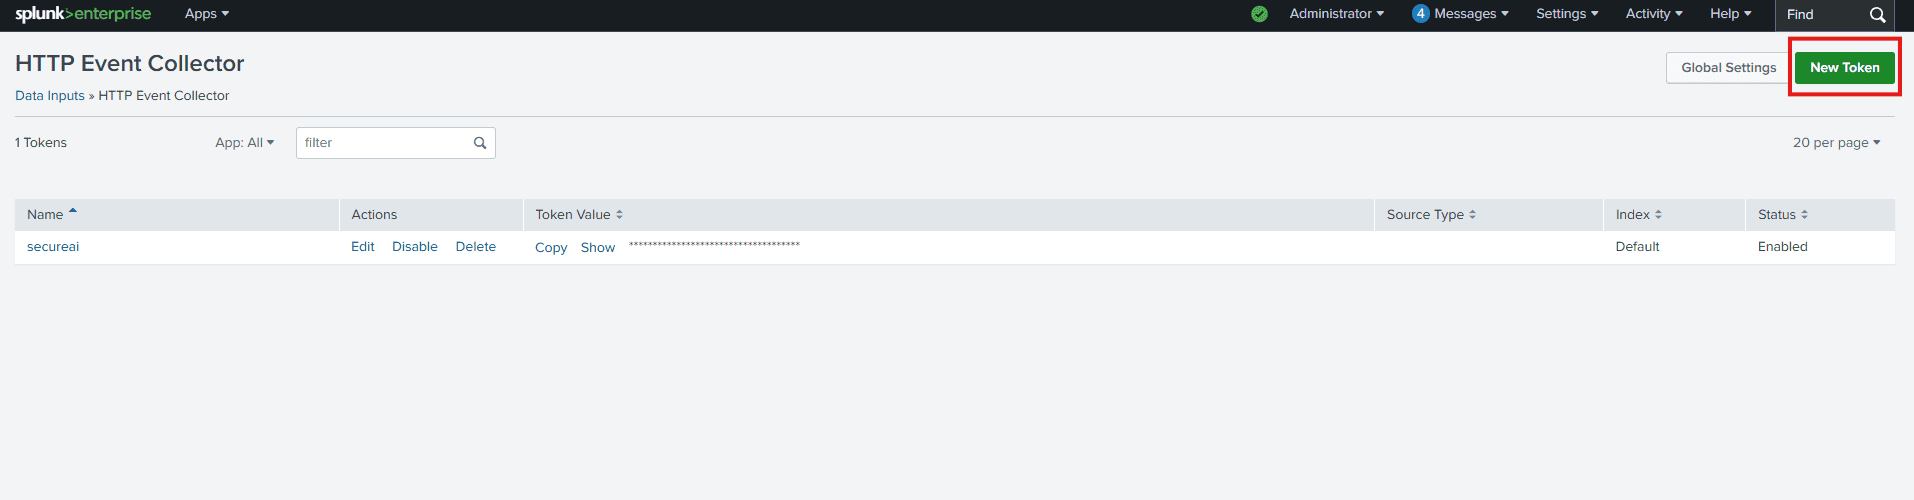
### A. Return to the HTTP Event Collector page (Settings > Data Inputs > HTTP Event Collector).
### B. Click the New Token button.
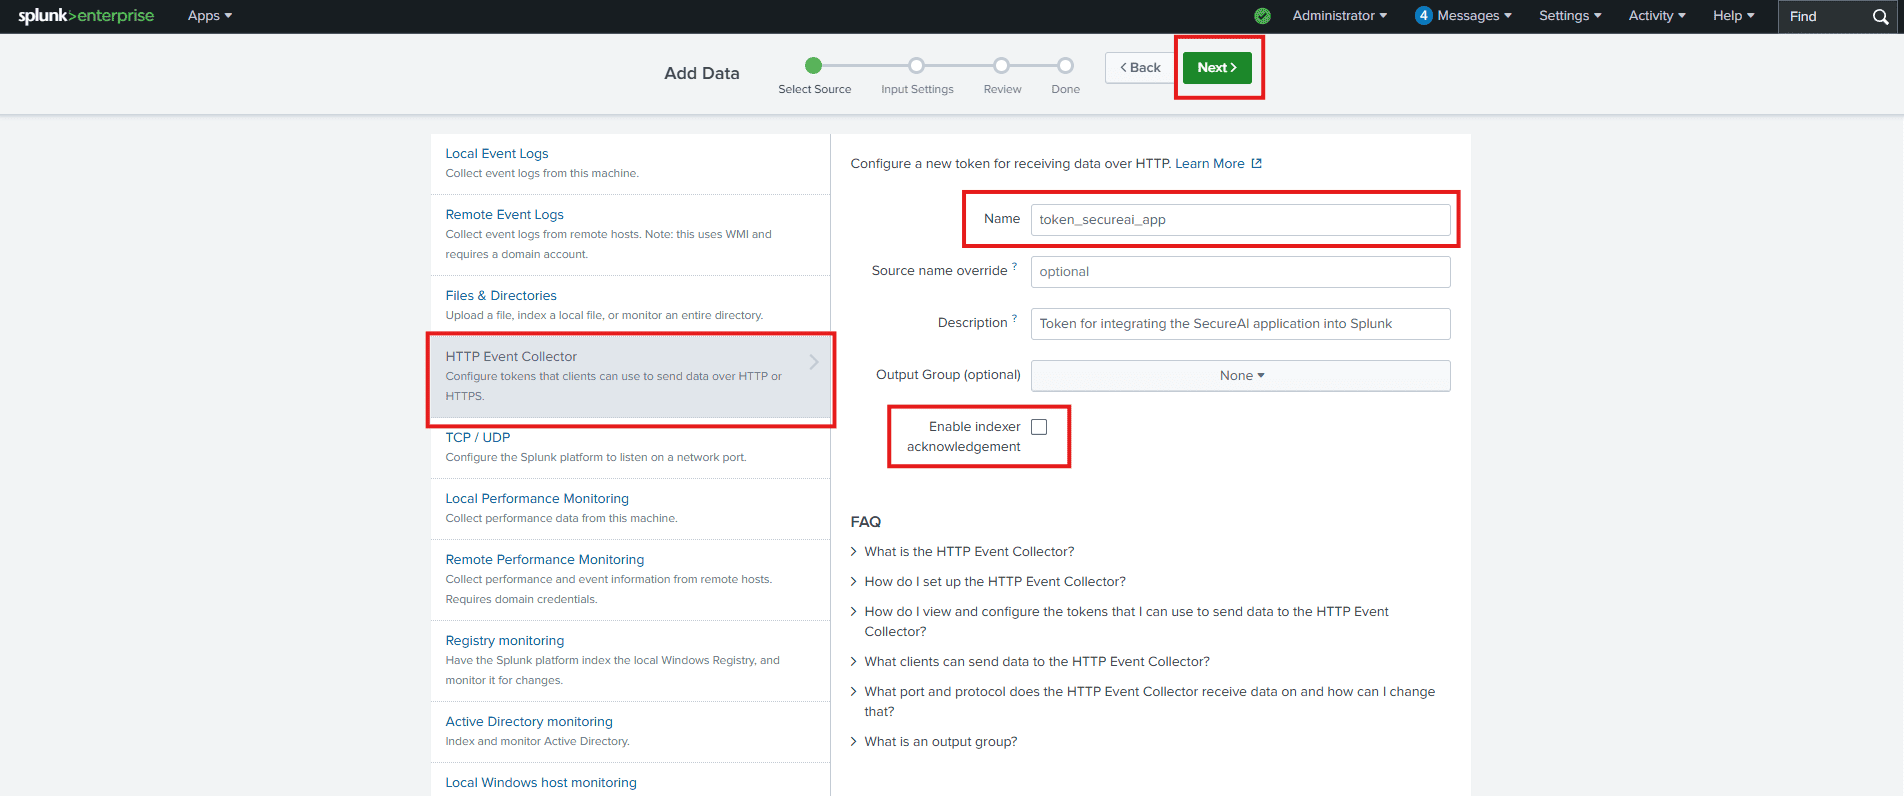
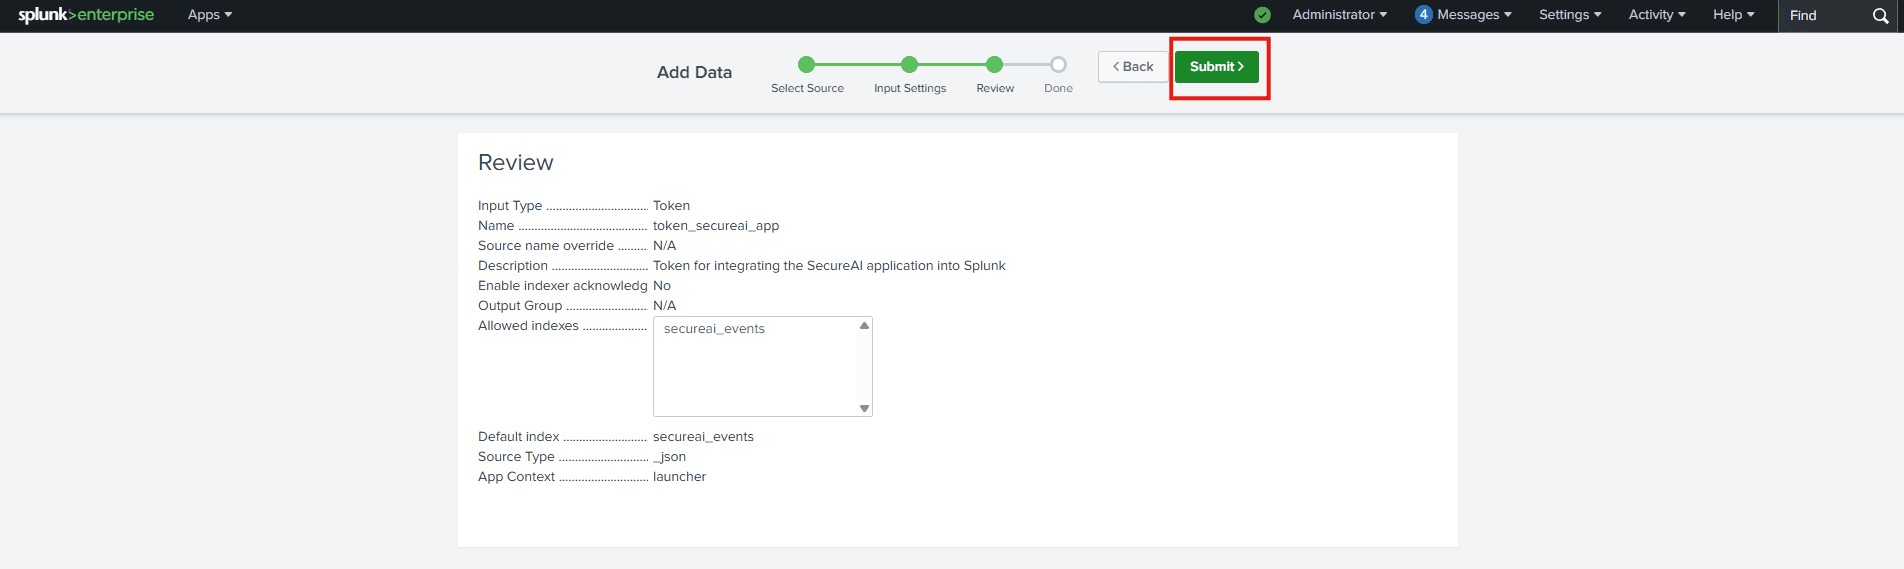
### C. Token Configuration (Tab 1):
* **Name**: `token_secureai_app`
* **Description**: (Optional) Add a brief description.
* **Enable indexer acknowledgment**: **IMPORTANT**: Ensure this checkbox is unchecked.
* Click **Next**.
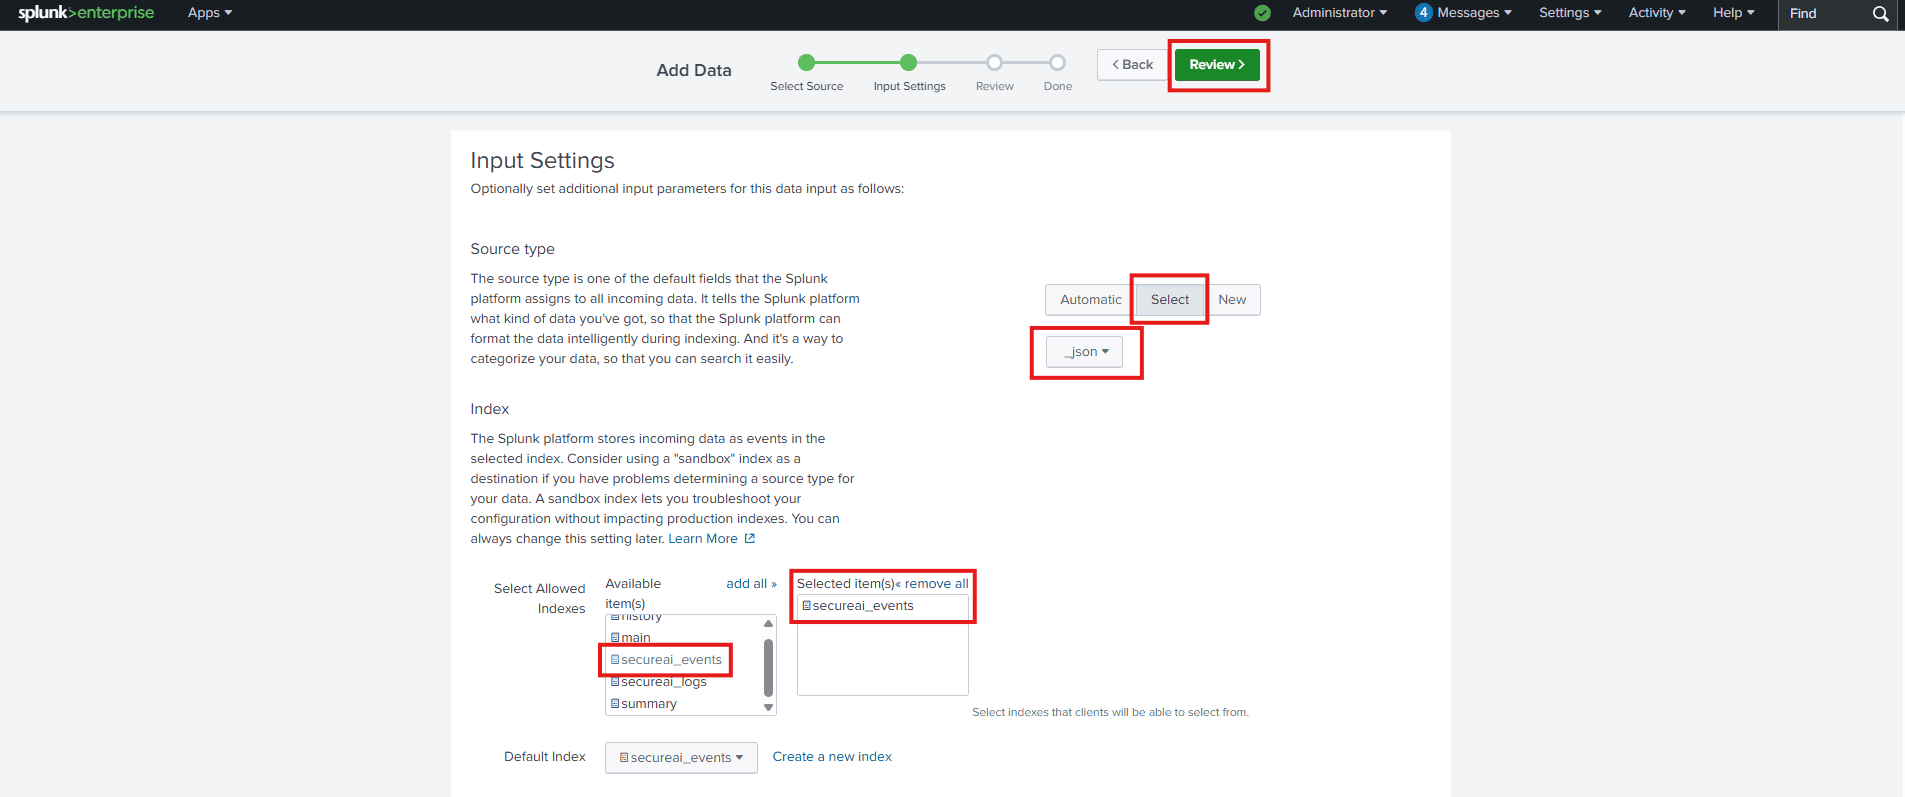
### D. Input Settings (Tab 2):
* **Source Type**: Click Select. In the search field, type `_json` and select it from the list. This tells Splunk to expect data in JSON format.
* **Allowed Indexes**: In the "Available indexes" column, find the index we created (`secureai_events`) and click it to move it to the "Selected indexes" column.
* **Default Index**: Select `secureai_events` from the dropdown menu.
* Click **Review** and then **Submit**.
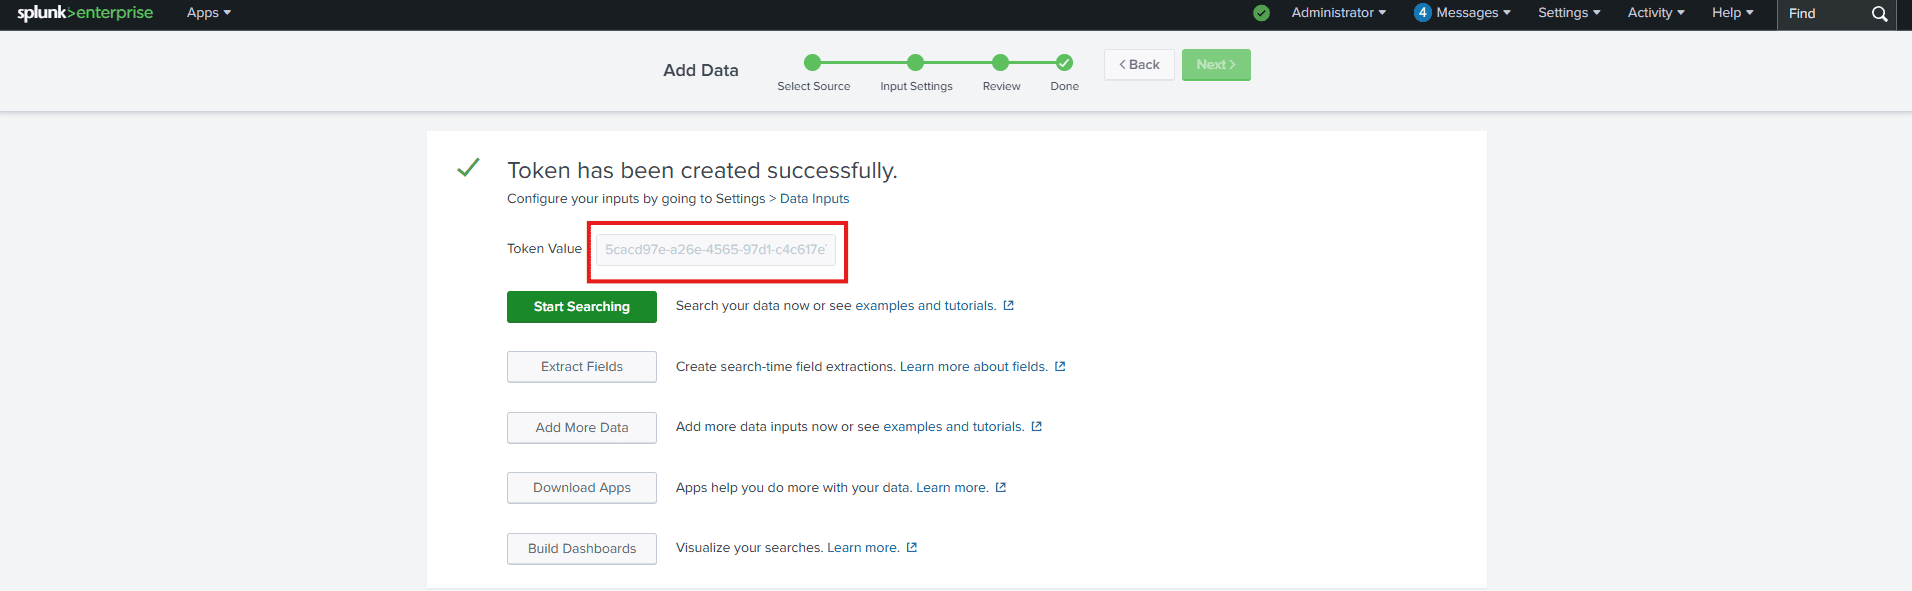
### E. Copy the Token Value!
Splunk will now display the token value. Copy it immediately and save it in a secure location. This is the token you will need to configure in our application.
## Step 4: Finalize and Share Information
You're almost done. Just one final step.
### A. Gather the Information
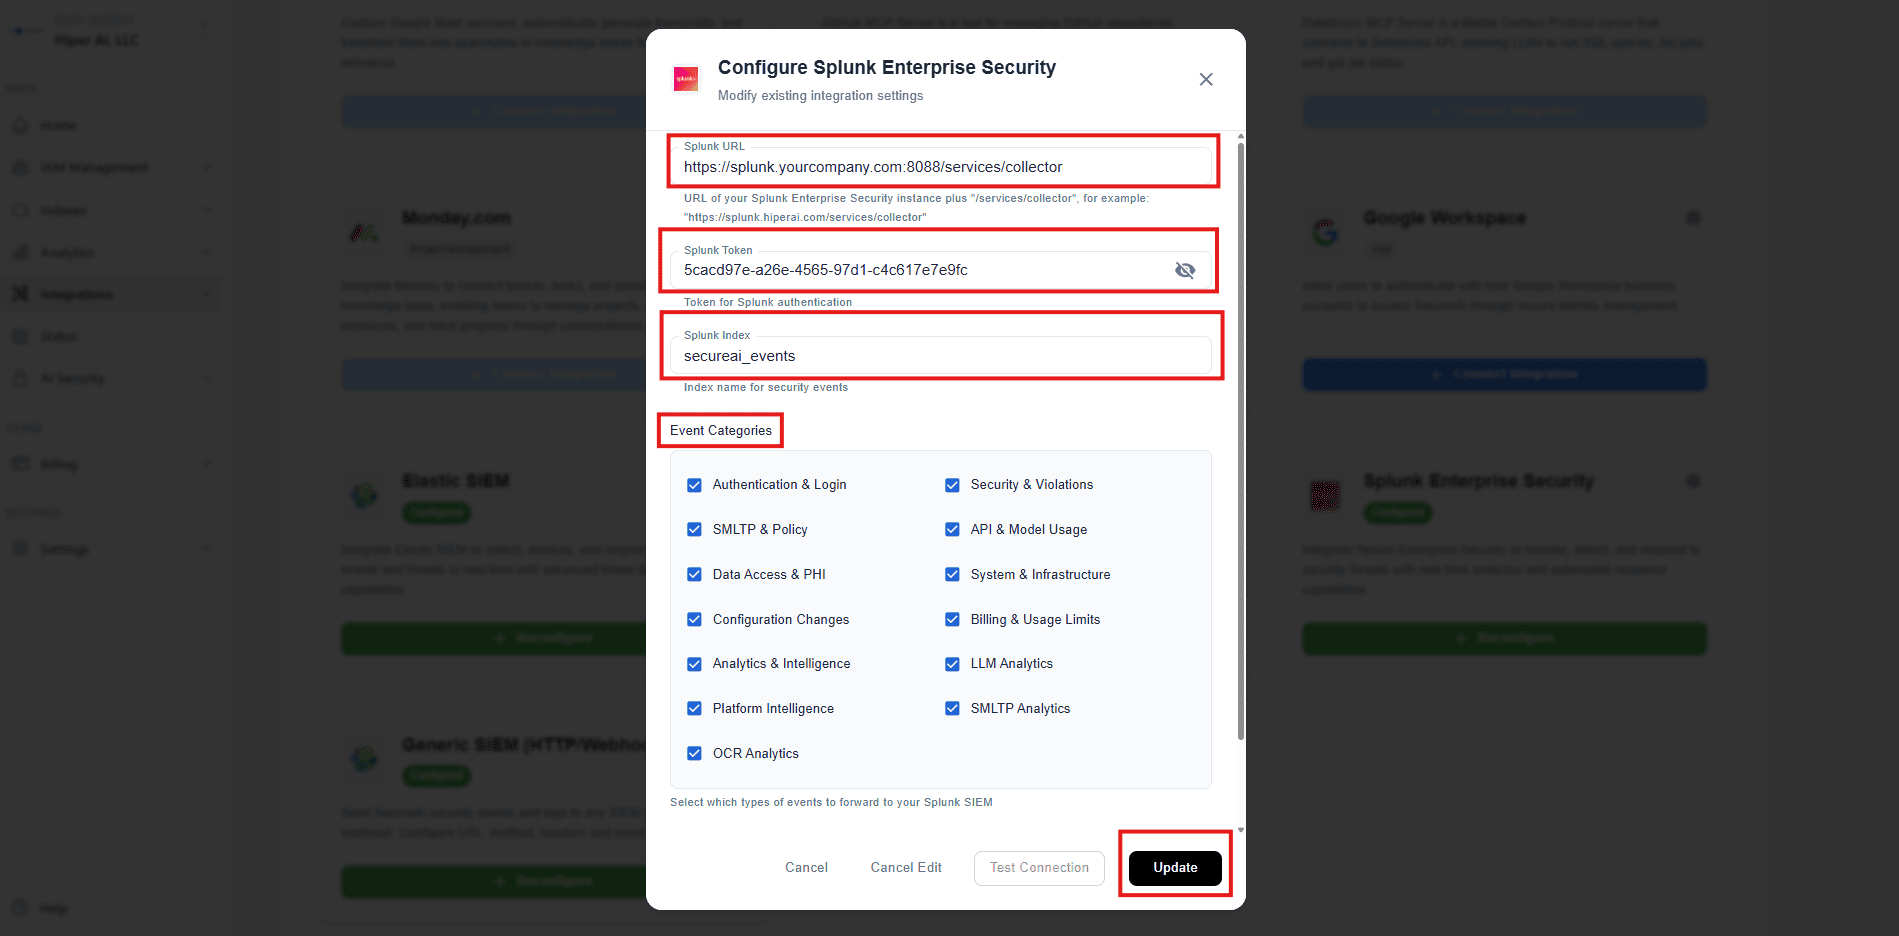
To complete the integration, the application needs the following three pieces of information:
1. **HEC URL**: The address of your Splunk server and the HEC port (e.g., `http://splunk.yourcompany.com:8088/services/collector`).
2. **The HEC Token**: The value you copied in the previous step.
3. **The Index Name**: The name of the index you created (`secureai_events`).
### B. Review Firewall Rules
Ensure that any firewall between the application server and your Splunk server allows traffic on the HEC port (typically TCP 8088).
## Step 4: Note on Data Format (Sourcetype)
To ensure data is correctly identified and parsed, our application sends logs in a specific structured JSON format.
**Important**: All events sent from SecureAI will have the sourcetype `secureai:json`.
This value is set directly in the data payload sent by our application, so it will automatically override the default sourcetype (`_json`) you selected for the token. No further action is required, but it is important for you to know that you will find the data under the sourcetype="secureai:json" in your searches.
## Step 6: Verify the Integration
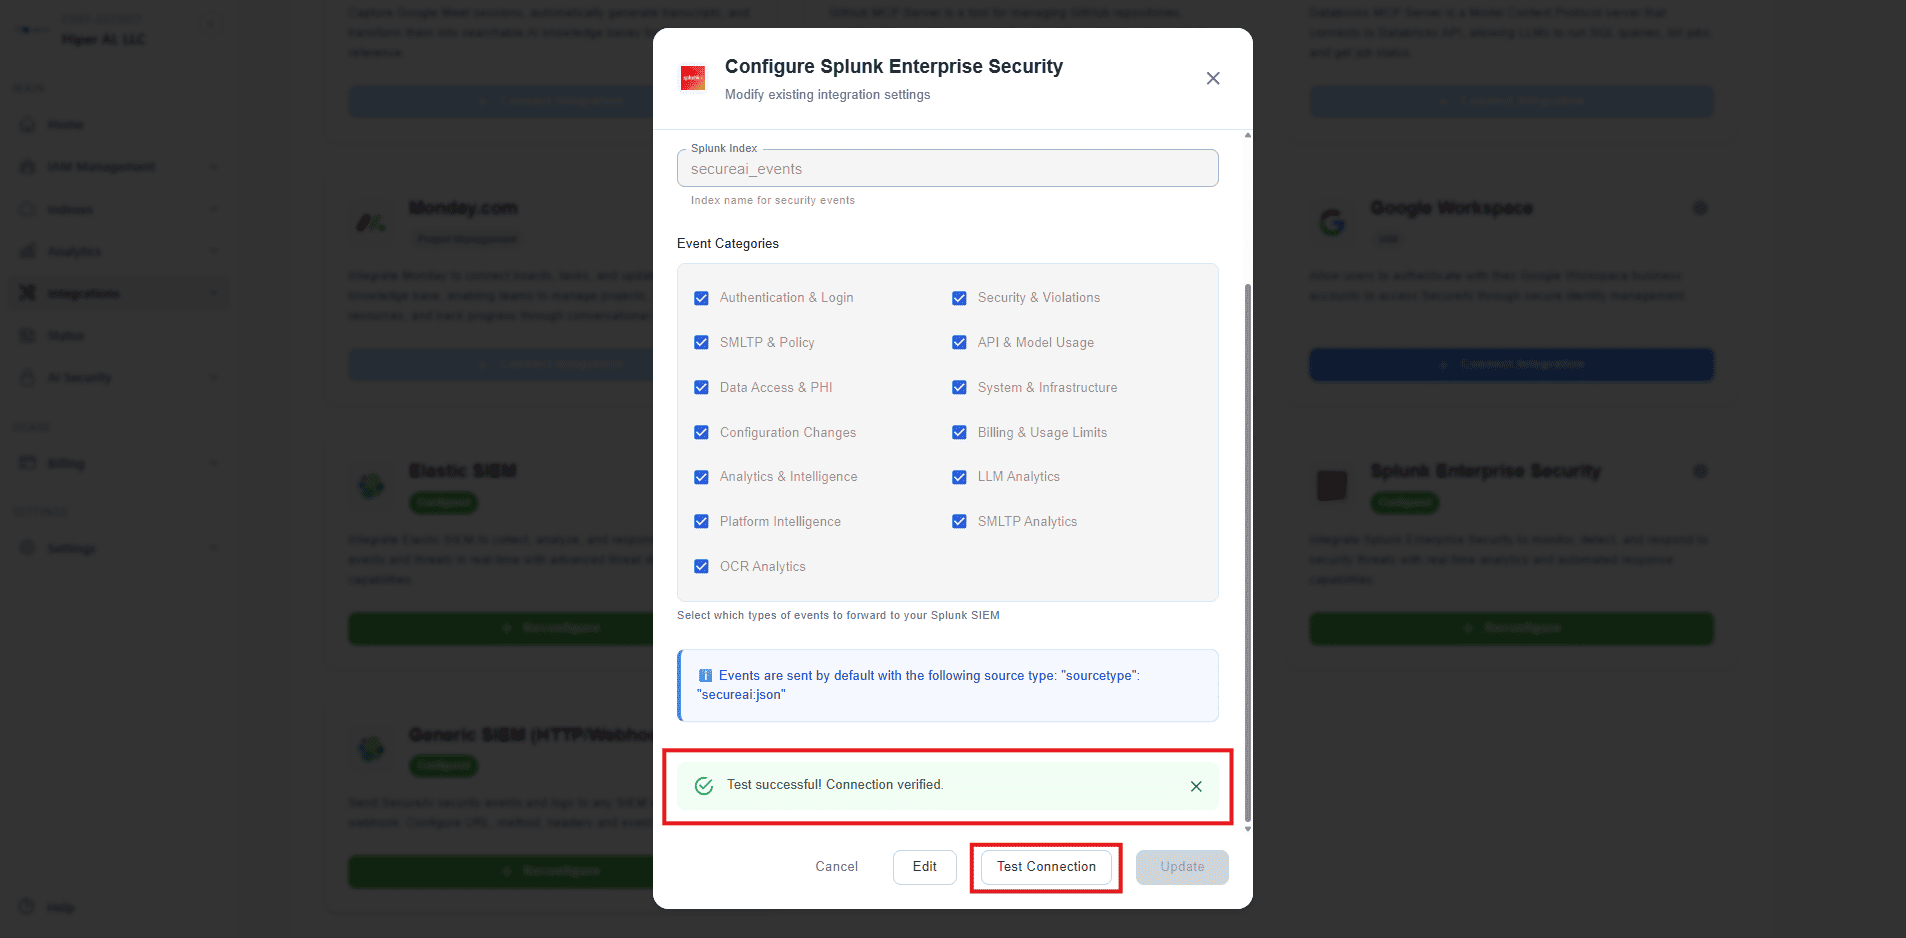
Once you have entered the integration details into the SecureAI application, you can verify that the connection is working correctly.
### A. Test the Connection
Use the "Test Connection" button within our application. This will send a test event to your Splunk index.
You will see a success message if the event was sent correctly or an error message if any of the provided data is incorrect.
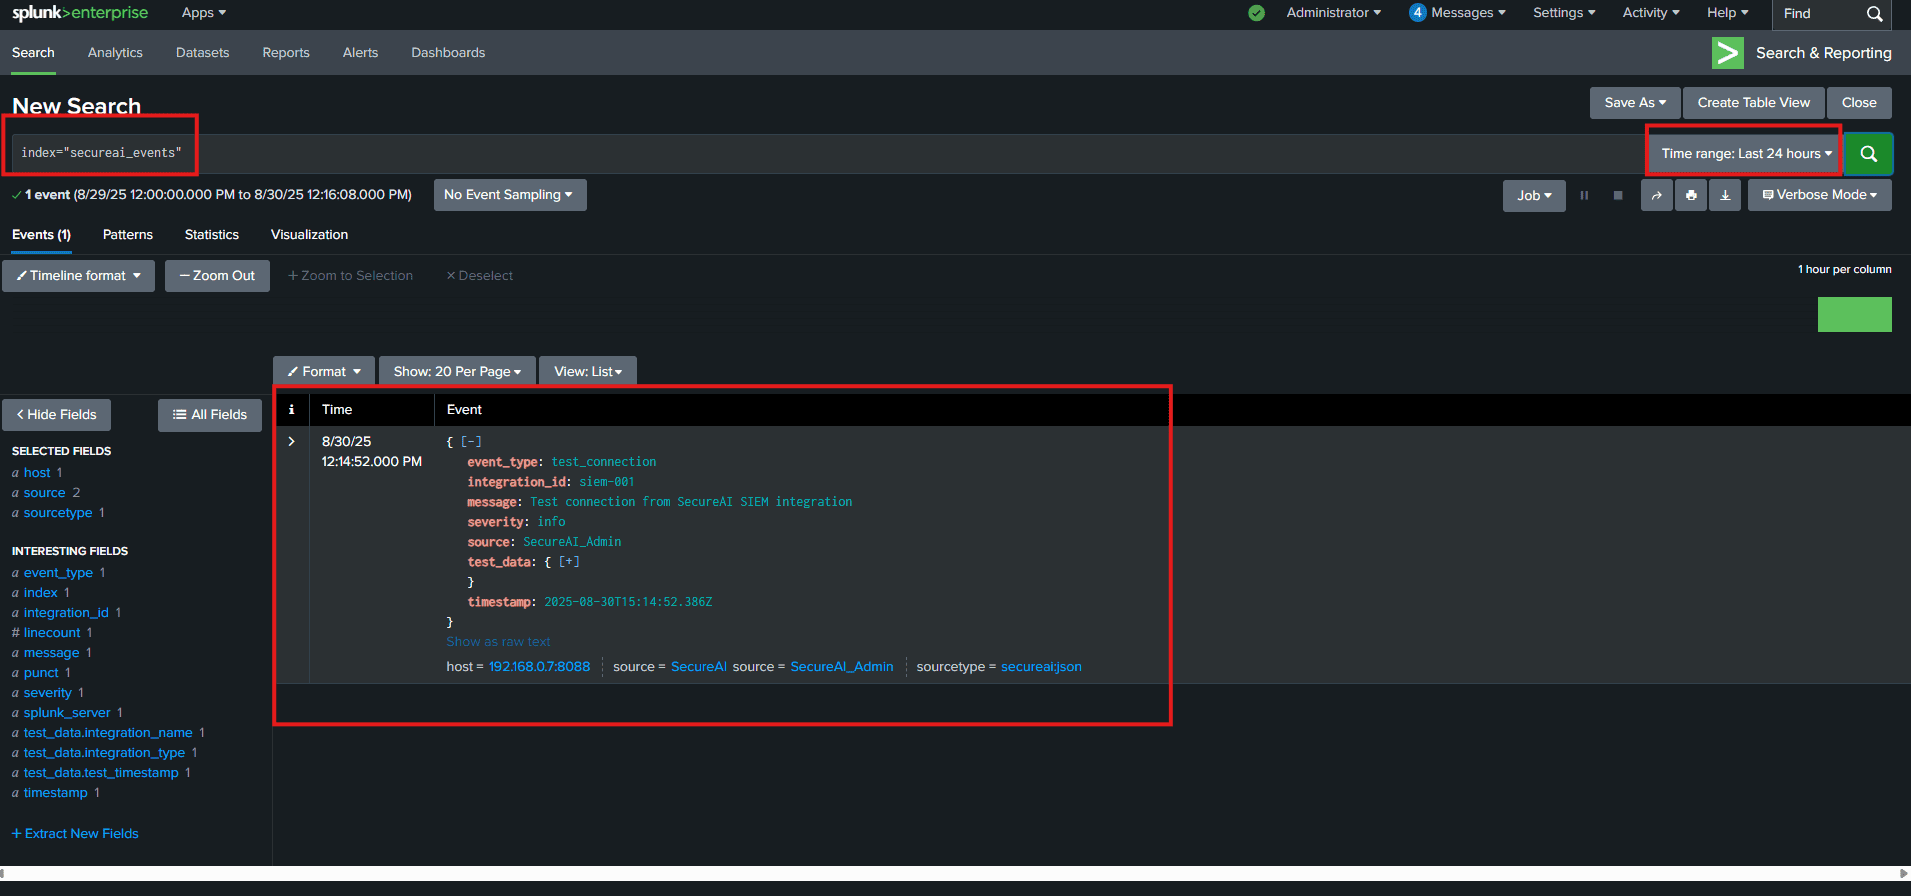
### B. Find the Test Event in Splunk
To see if the event arrived in Splunk, go to the Search & Reporting app.
In the search bar, run a search for your index (e.g., `index="secureai_events"`).
Set the Time Range to "Last 24 hours". You should see the test log appear in the results.
**Note**: Depending on network traffic and system load, it can sometimes take up to 10 minutes for logs to appear in Splunk.
## Done!
With these steps, your Splunk instance is fully configured to integrate with SecureAI 😎.