> ## Documentation Index
> Fetch the complete documentation index at: https://docs.hiperai.com/llms.txt
> Use this file to discover all available pages before exploring further.
# Elastic Security Integration
> Integrate HiperAI with Elastic Security for advanced threat detection and security analytics
# Integrating SecureAI with Elastic SIEM
This guide provides step-by-step instructions on how to integrate SecureAI with your Elastic SIEM instance. This integration allows you to forward event logs from SecureAI to Elasticsearch for monitoring, analysis, and alerting.
## Step 1: Obtain Your Elastic Cloud Endpoint
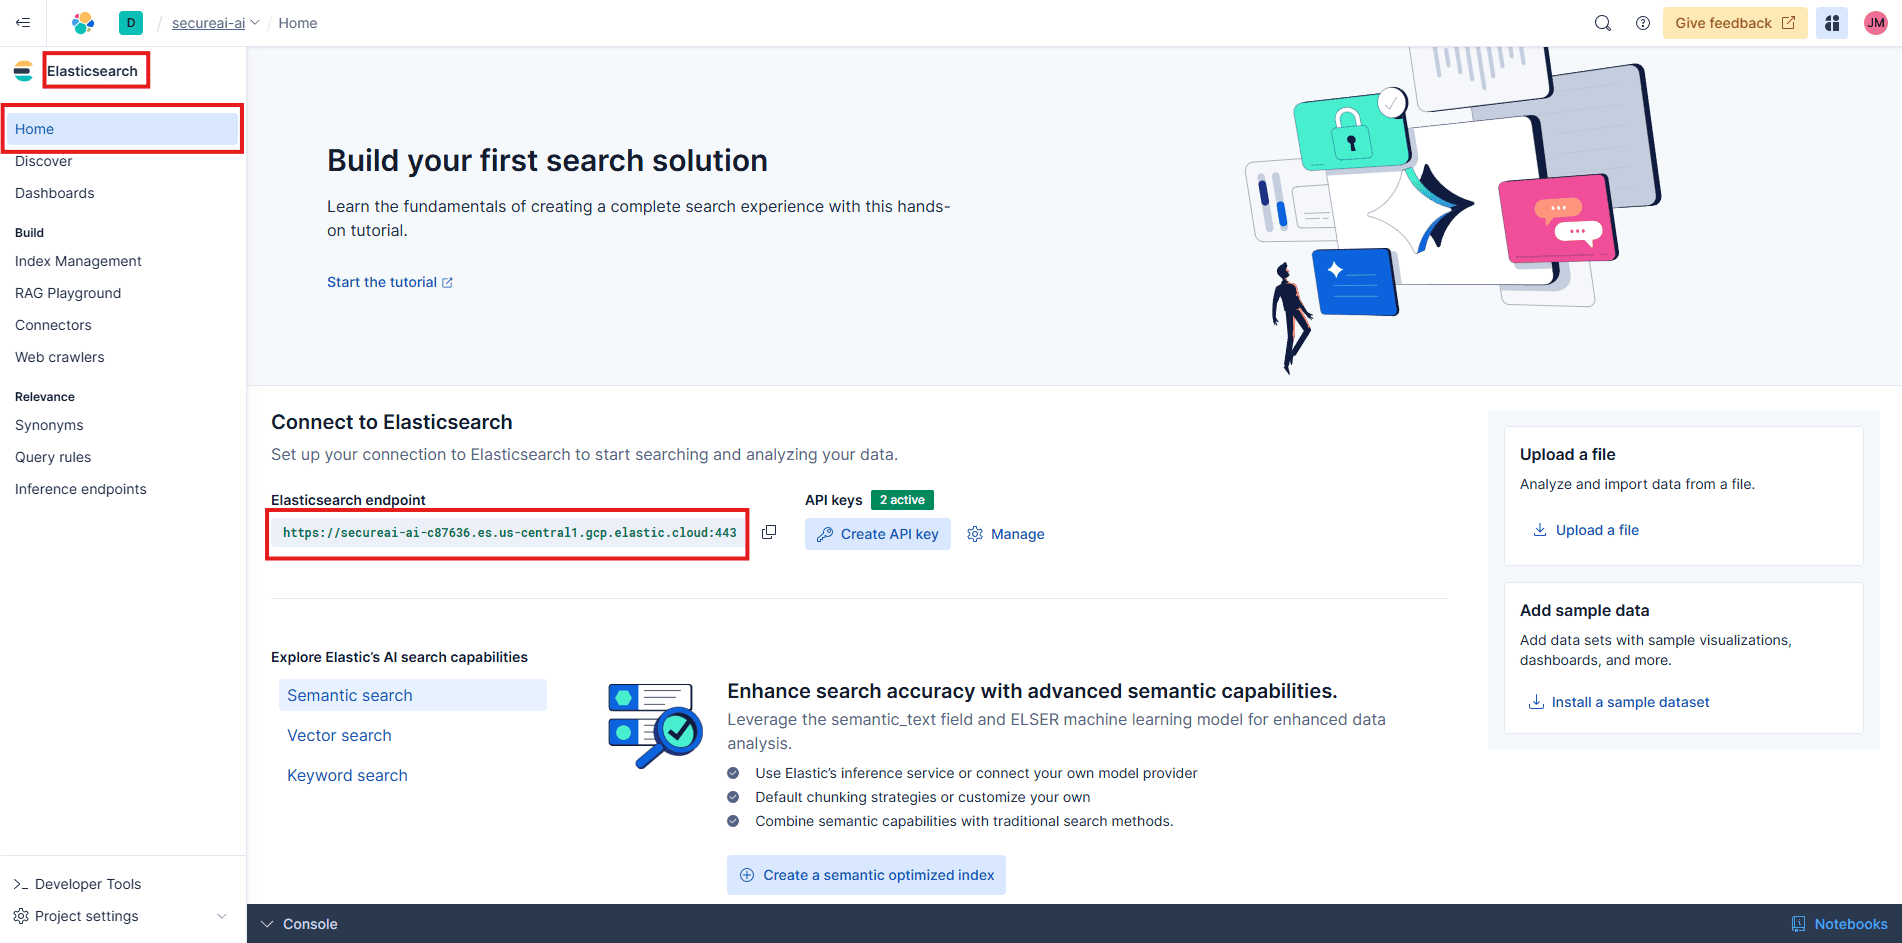
First, you need to get the endpoint URL from your Elastic Cloud deployment.
1. Log in to your Elastic Cloud account.
2. From the homepage, locate your desired deployment.
3. Find the Elasticsearch endpoint URL and copy it. You will need this for the SecureAI configuration later.
## Step 2: Create an API Key in Elasticsearch
An API key is required for SecureAI to securely send data to your Elasticsearch cluster.
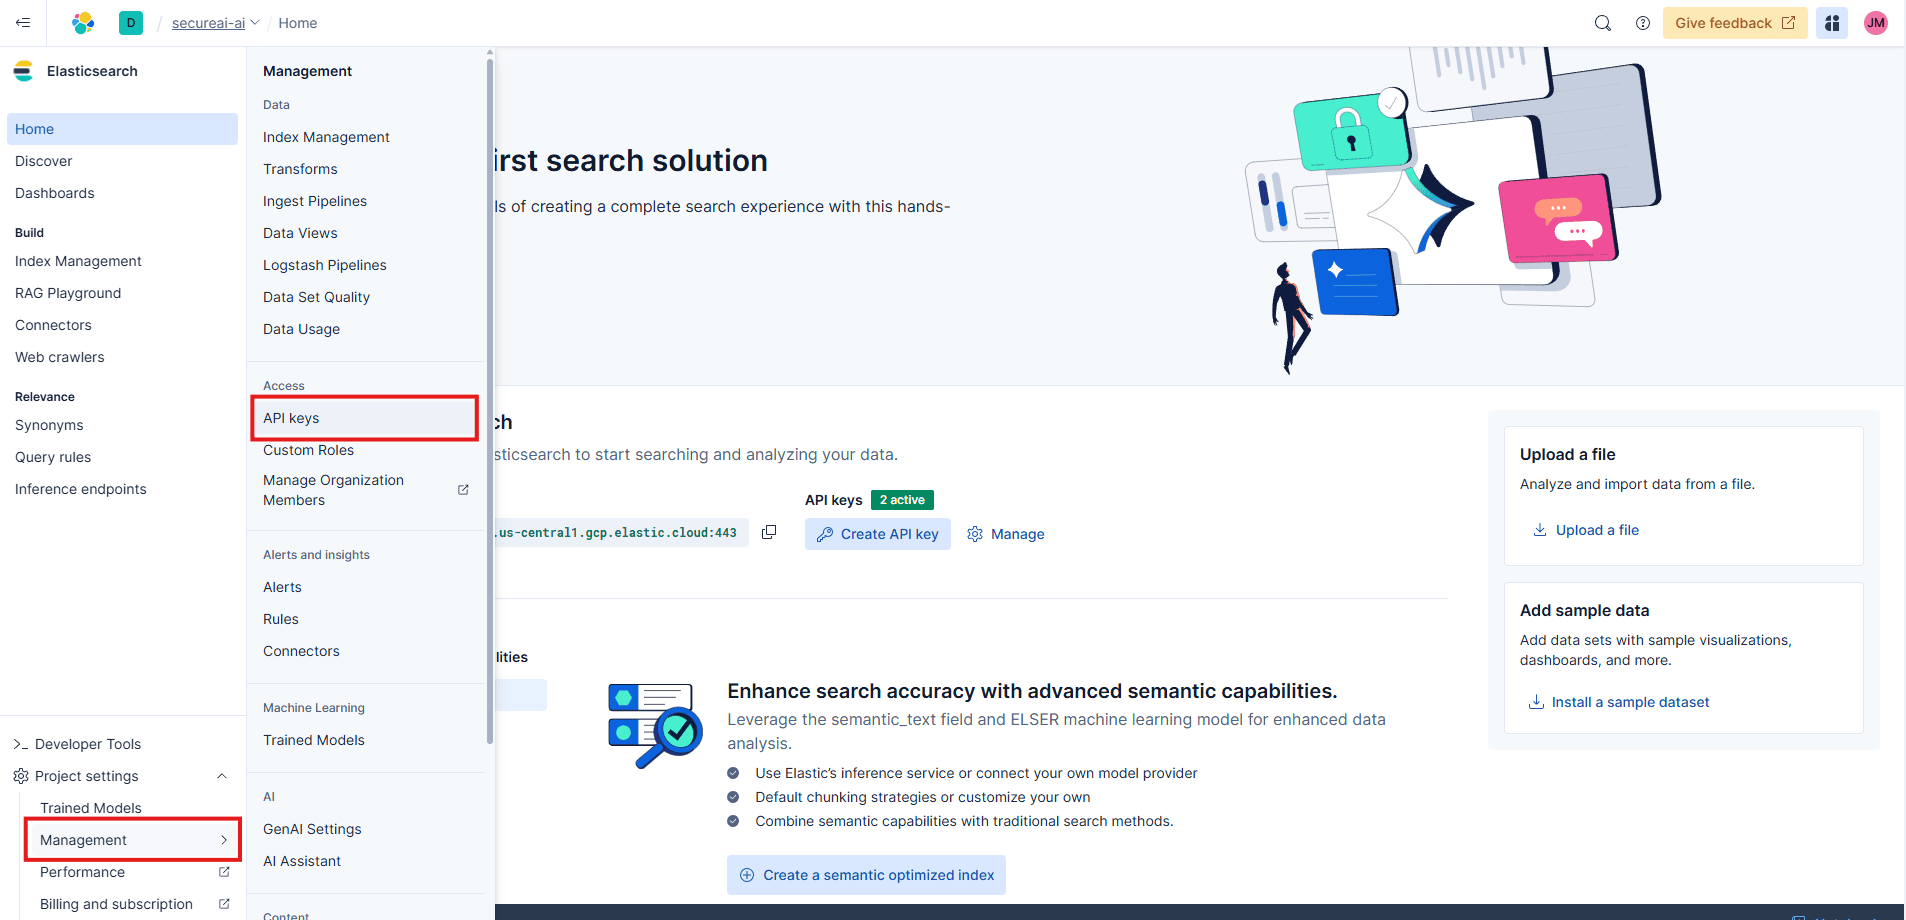
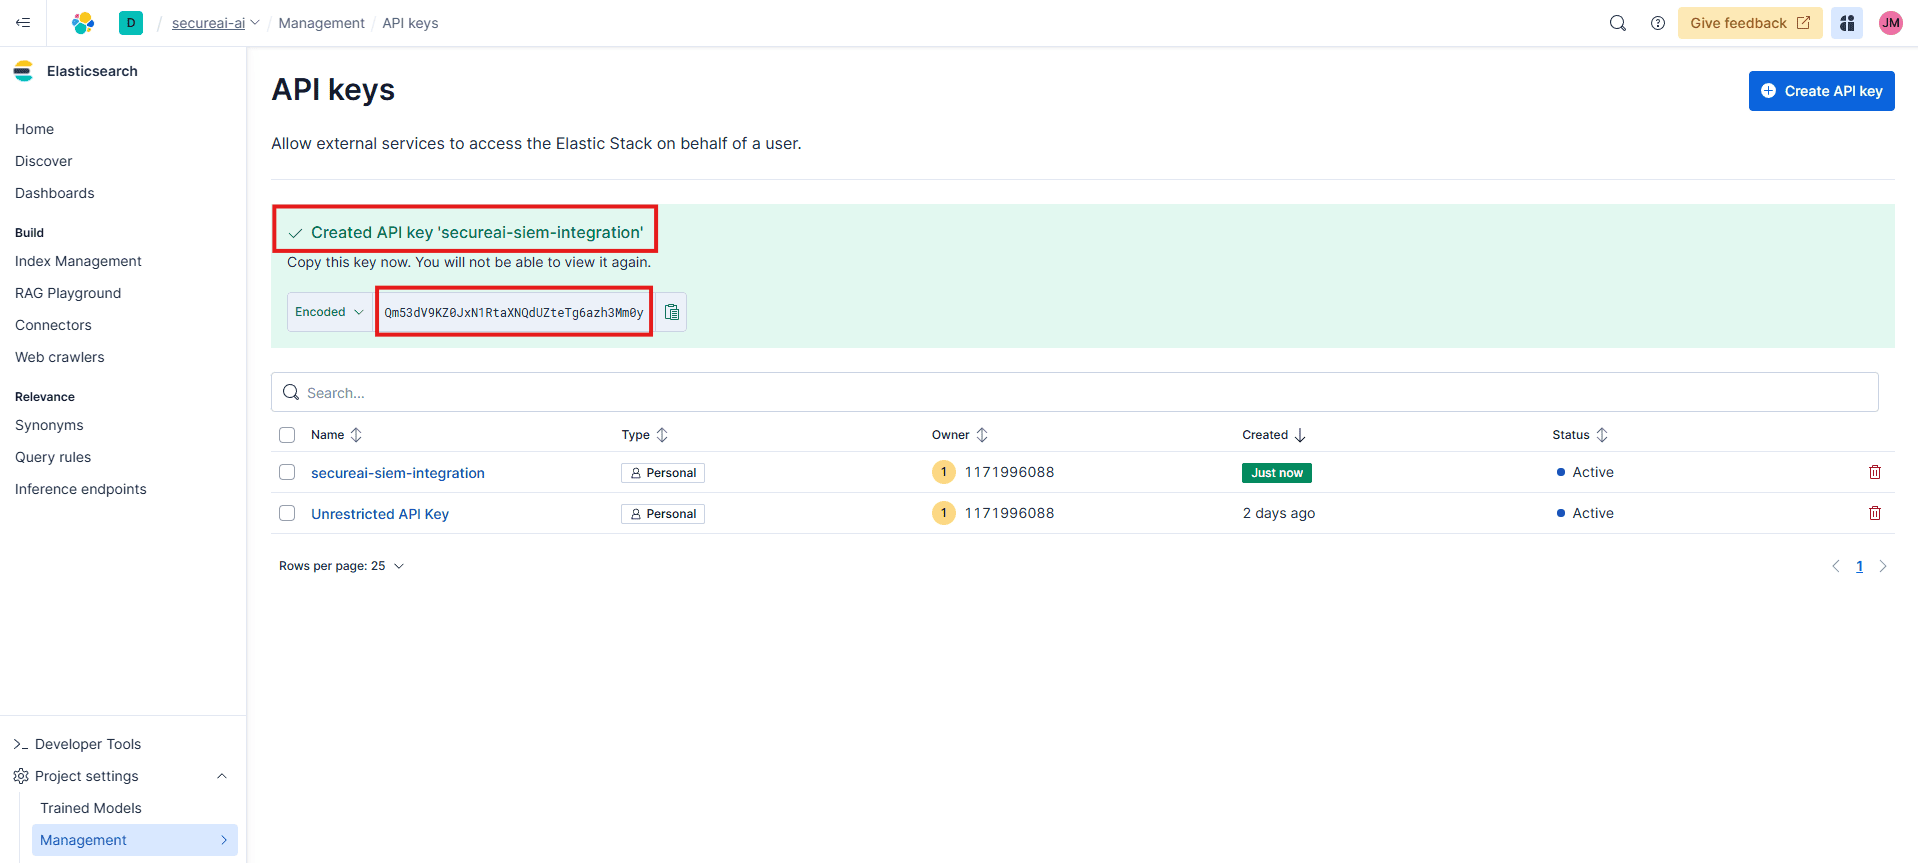
1. In your Kibana dashboard, navigate to **Management** > **API Keys**.
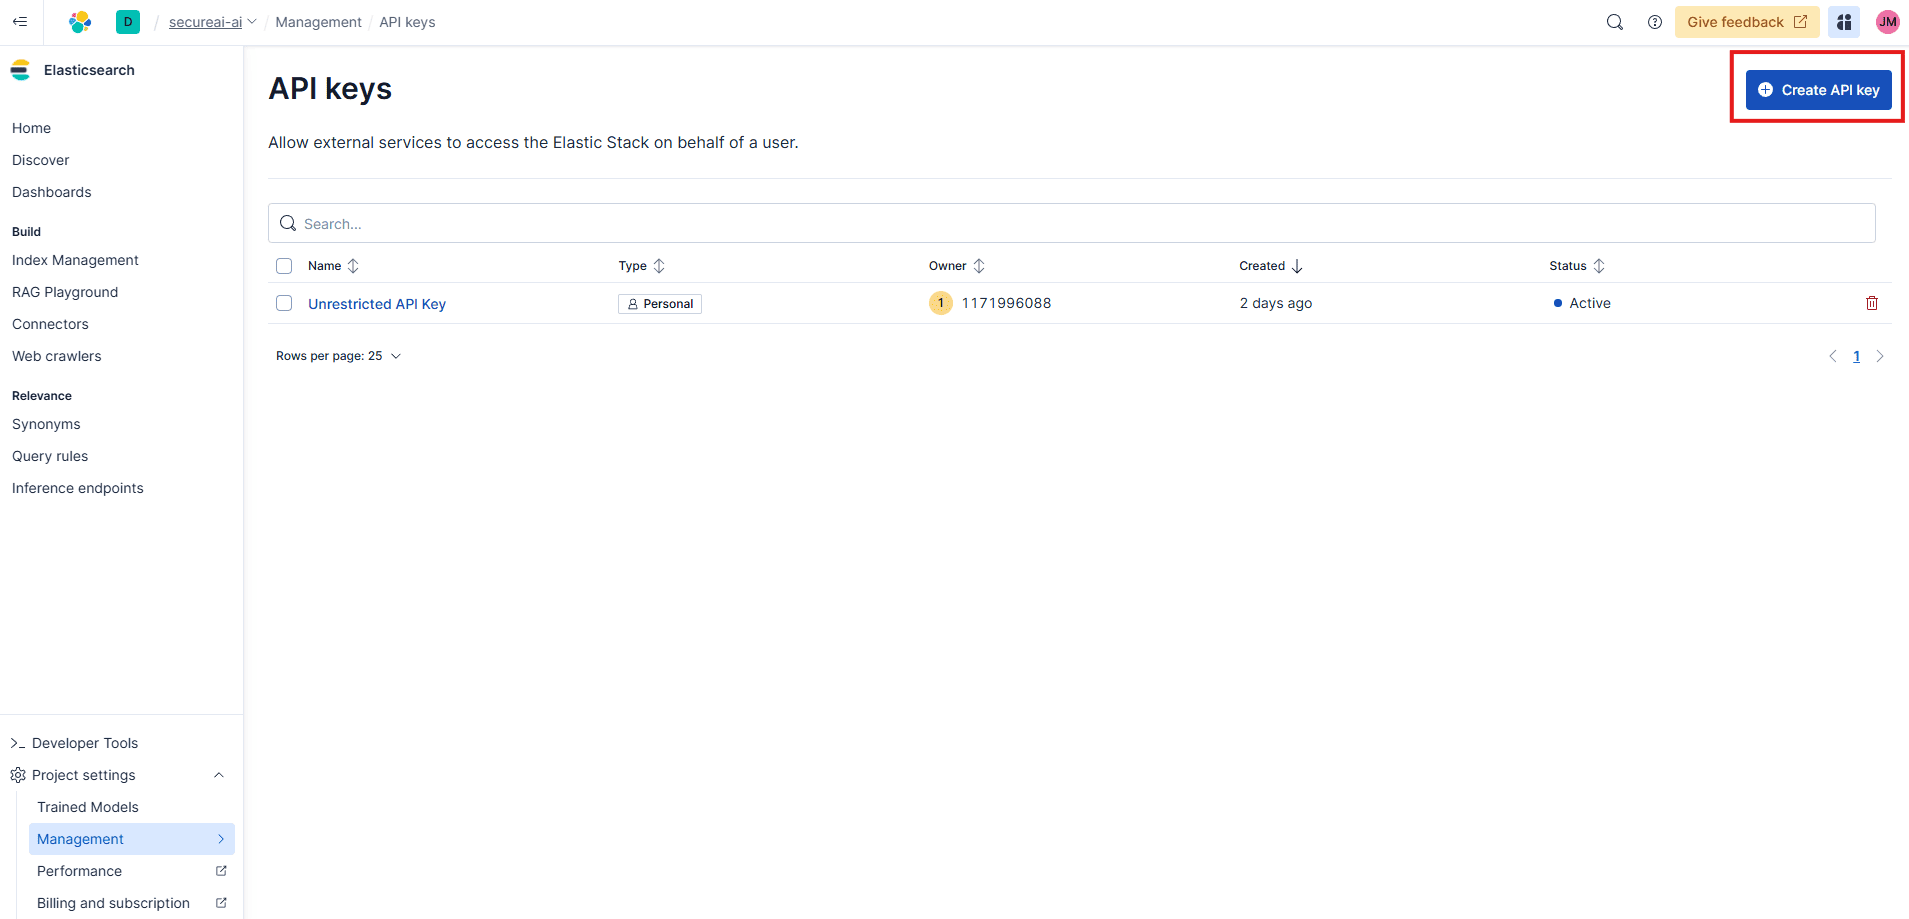
2. Click the **Create API key** button.
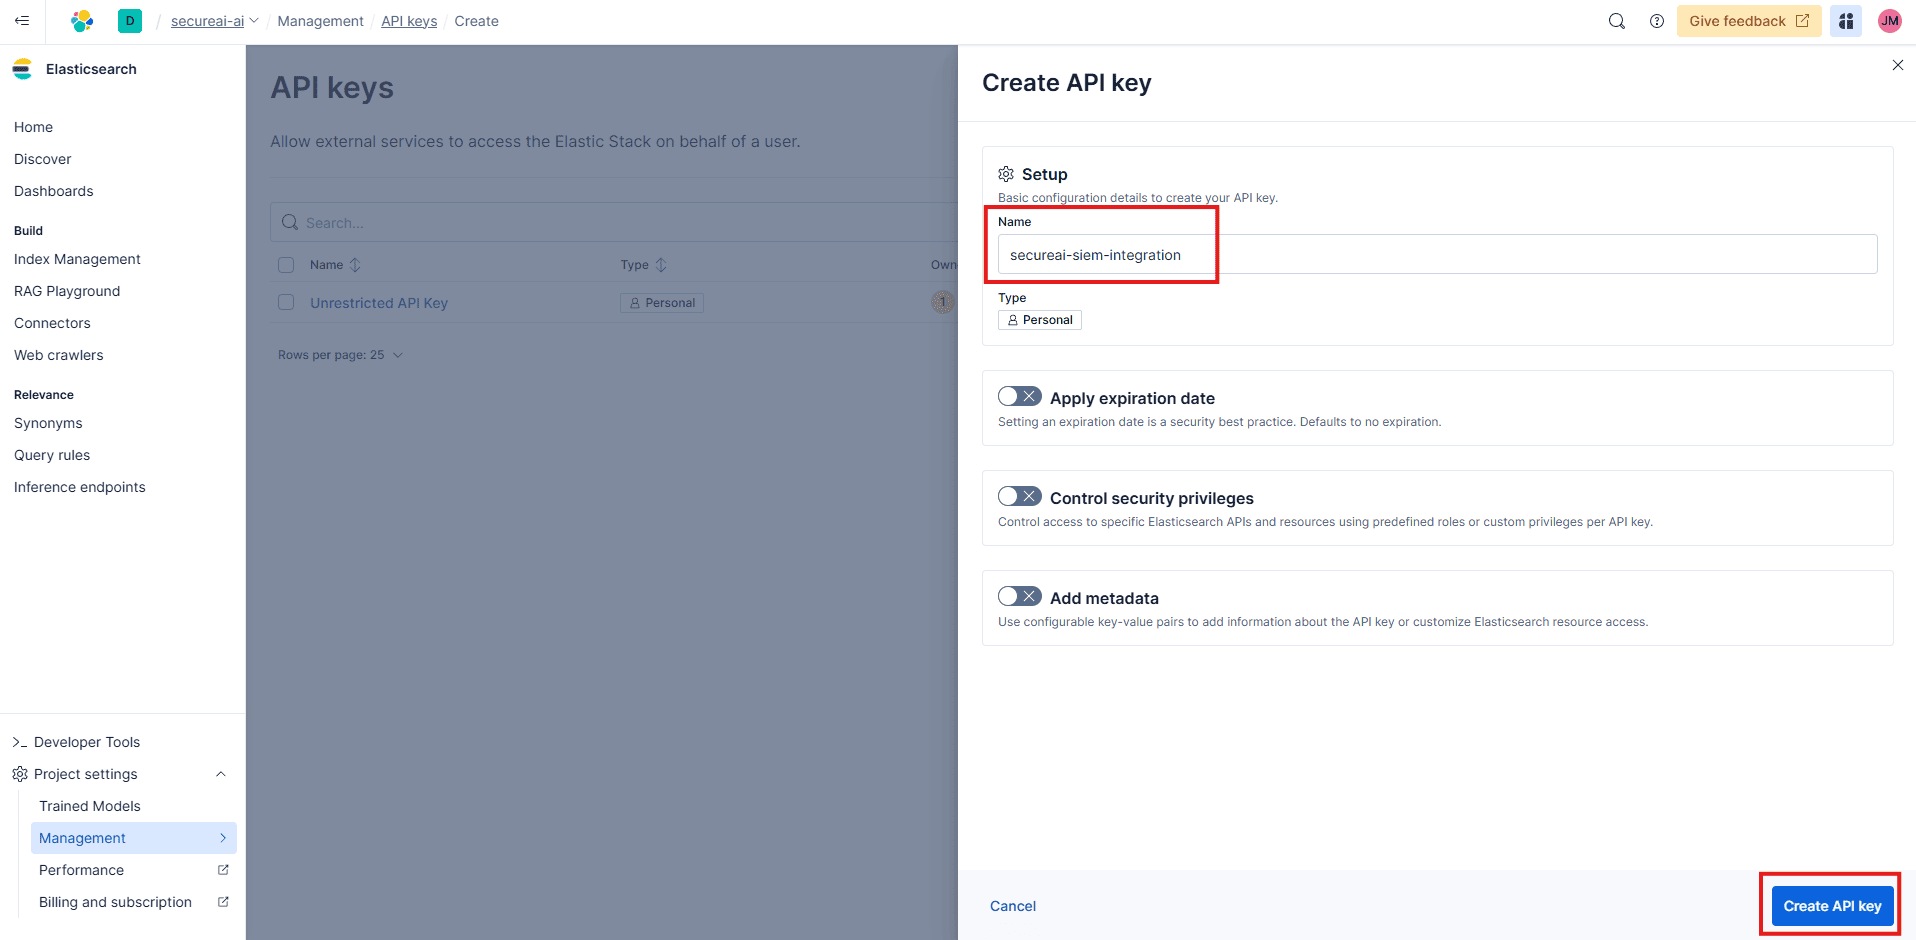
3. Configure the API key with the following details:
* **Name**: `secureai-siem-integration` (or another descriptive name).
* **Role**: Assign a role that has the necessary privileges to write to indices. For simplicity in this guide, we are not setting an expiration date or specific role restrictions.
4. Click **Create API key**.
5. Your key will be generated and displayed. Copy the Base64 encoded API key and save it in a secure location. You will not be able to see it again after you leave this screen.
## Step 3: Create the Target Index in Elasticsearch
You must create and map an index in Elasticsearch where the SecureAI events will be stored.
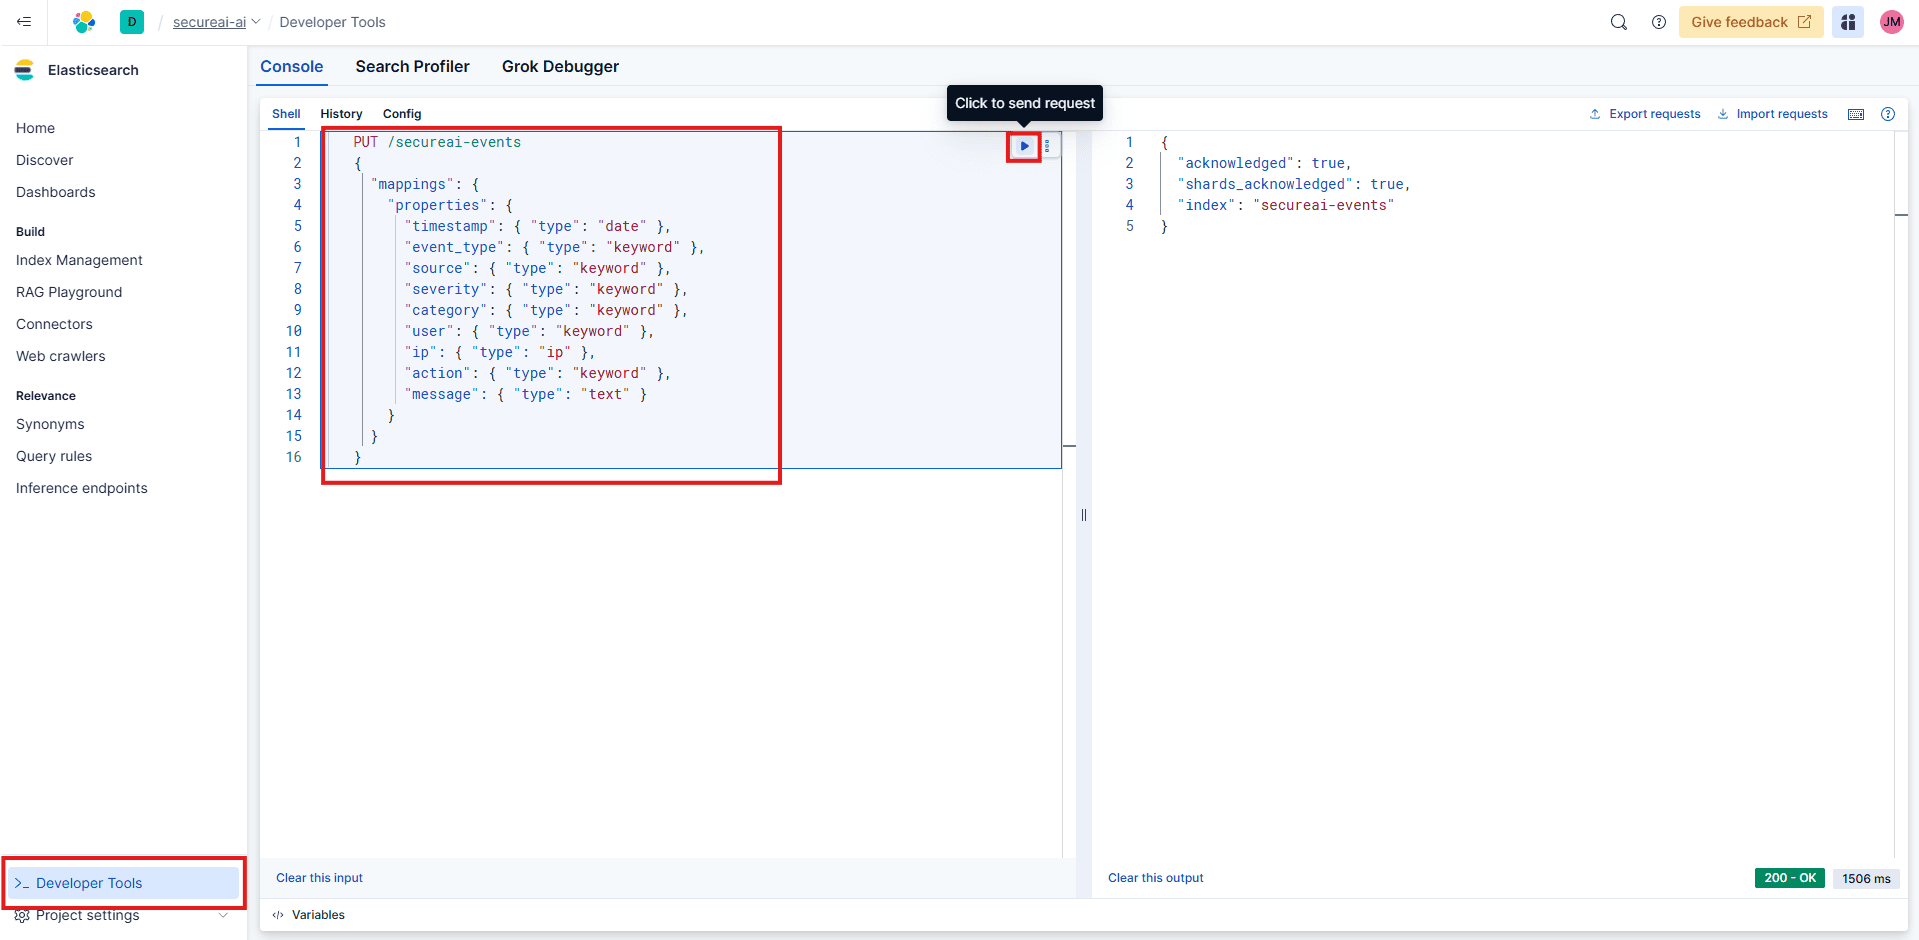
1. In Kibana, navigate to **Developer Tools**.
2. In the console, execute the following command to create the `secureai-events` index with the appropriate field mappings:
```json theme={null}
PUT /secureai-events
{
"mappings": {
"properties": {
"timestamp": { "type": "date" },
"event_type": { "type": "keyword" },
"source": { "type": "keyword" },
"severity": { "type": "keyword" },
"category": { "type": "keyword" },
"user": { "type": "keyword" },
"ip": { "type": "ip" },
"action": { "type": "keyword" },
"message": { "type": "text" }
}
}
}
```
## Step 4: Configure the Elastic SIEM Integration in SecureAI
Now, enter the Elastic details into the SecureAI integrations panel.
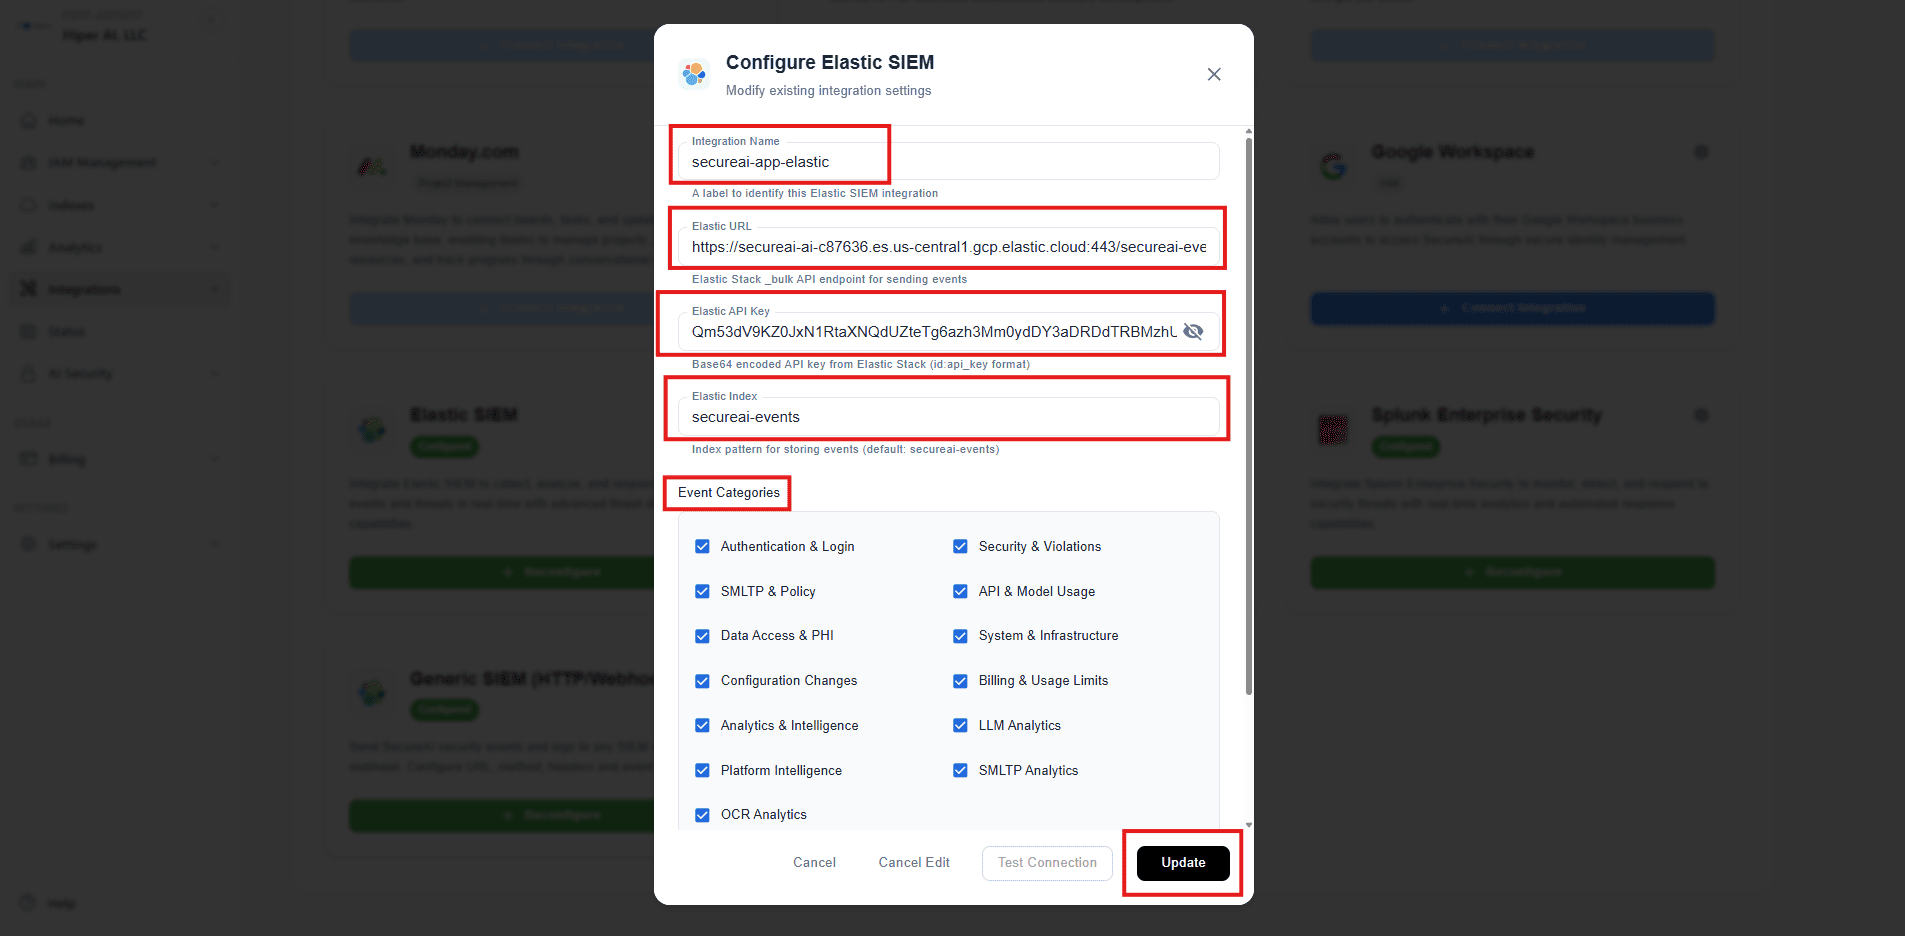
1. In your SecureAI dashboard, navigate to **Integrations**.
2. Locate the **Elastic SIEM** integration card and click **Configure**.
3. Fill in the configuration fields as follows:
* **Integration Name**: `secureai-app-elastic`
* **Elastic URL**: Paste the endpoint you copied in Step 1.
* **Elastic API Key**: Paste the Base64 encoded API key you created in Step 2.
* **Elastic Index**: `secureai-events`
* **Select Event Categories**: Check all the boxes to forward all available event types to your Elastic SIEM.
4. Click **Update** to save the configuration.
## Step 5: Test and Verify the Connection
After saving the configuration, test the connection to ensure SecureAI can communicate with your Elastic instance.
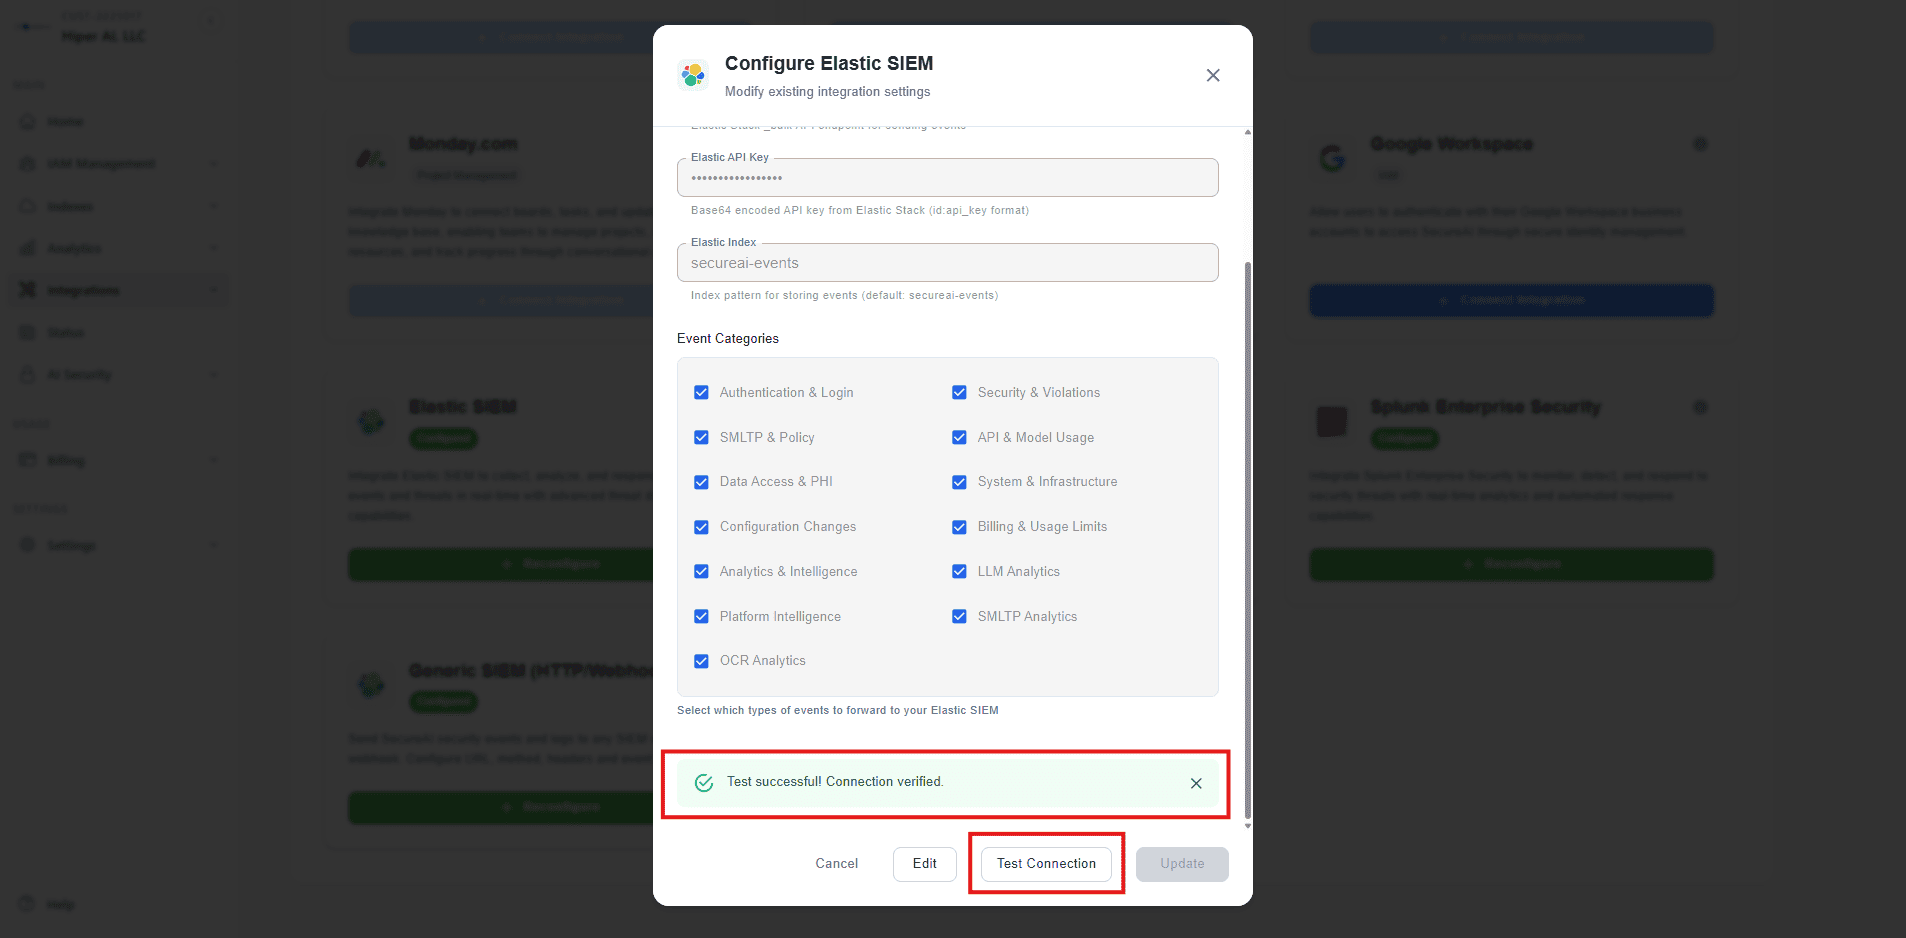
1. In the integration settings modal, click the **Test Connection** button.
2. You should see a success message: "Test successful! Connection verified."
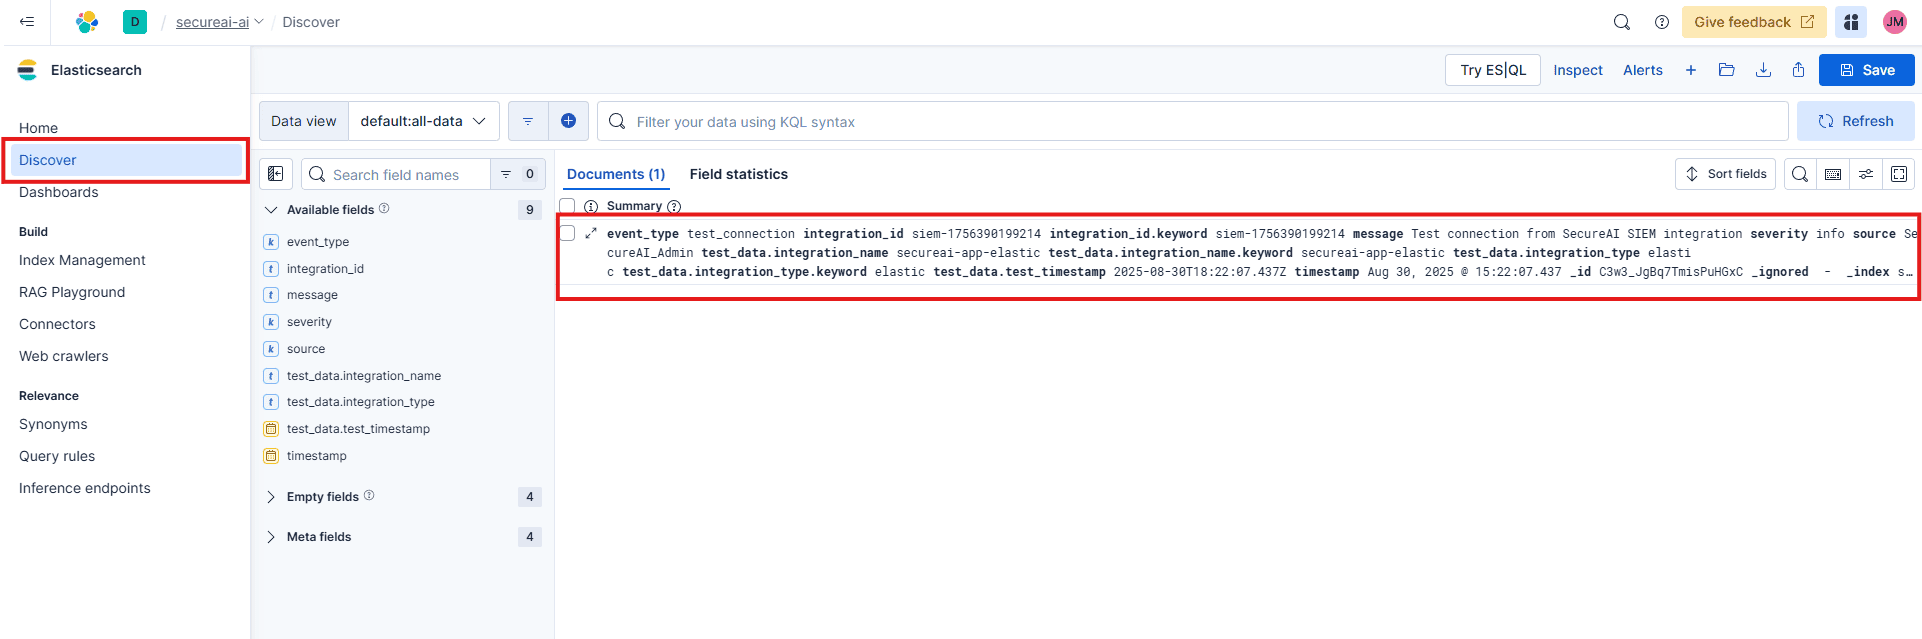
3. To confirm the test data was received, go to **Discover** in Kibana.
4. Select the `secureai-events` data view (index pattern).
5. You should see a test event log from SecureAI, which confirms that the integration is working correctly.
Your SecureAI and Elastic SIEM integration is now active. Events will be logged in your `secureai-events` index as they occur.
## Done!
With these steps, your Elastic instance is fully configured to integrate with SecureAI 😎.